Table of Contents
Introduction
The success of any business largely depends on its ability to effectively communicate with its customers. One of the best ways to do that is through targeted email marketing campaigns. Campaigns by Pipedrive is a powerful tool that can help businesses of any size to create effective email campaigns, resulting in higher engagement rates and more sales. In this step-by-step tutorial, I will guide you through the basics of setting up and using Campaigns by Pipedrive, so you can start creating engaging email campaigns to bring you more business.
Before we begin, let’s briefly discuss the Why.
Why Email marketing campaigns?
There are several reasons why businesses should invest time and resources into email marketing campaigns. For one, email is a highly effective way to communicate with customers and prospects, as most people check their email daily. Additionally, email marketing campaigns can be highly personalized, allowing businesses to target specific segments of their audience with relevant content. Furthermore, email marketing campaigns can be tracked and analyzed, providing valuable insights into what types of content and messaging resonates with your audience. Overall, email marketing campaigns are a cost-effective way to build relationships with customers, drive sales, and grow your business.
Why CRM Integration with Email Marketing is Important?
The main benefit of integration is that it allows businesses to have a more comprehensive view of their customers, which is essential for delivering relevant, targeted content. When email marketing tools are integrated with a CRM, businesses can track a range of metrics, such as email open rates and click-through rates, which can be used to inform future email marketing campaigns. Additionally, integration can help businesses save time and reduce errors by automating certain tasks, such as list management and segmentation. Ultimately, integration between email marketing tools and a CRM is critical for building stronger relationships with customers and growing your business.
Why Choose Campaigns by Pipedrive for Email Marketing?
Campaigns by Pipedrive is a fully-integrated, easy-to-use email marketing tool offering a range of features designed to help businesses create and execute effective email campaigns. With Campaigns by Pipedrive, businesses can create personalized email campaigns, set up automated sequential drip campaigns, segment their audience, and track their results in real-time. In true form to Pipedrive, the platform offers a user-friendly interface that is easy to navigate, even for those with limited technical expertise. Ultimately, using Campaigns by Pipedrive can help businesses build stronger relationships with their customers, increase engagement, and drive revenue growth.
Now that we’ve discussed the why, let’s get started with Campaigns by Pipedrive!
Setting Up Campaigns by Pipedrive
Enable Campaigns by Pipedrive
Sign into your Pipedrive account. If you don’t have one yet, you can sign up for 30 days free with my link. Then come right back here and complete this tutorial.
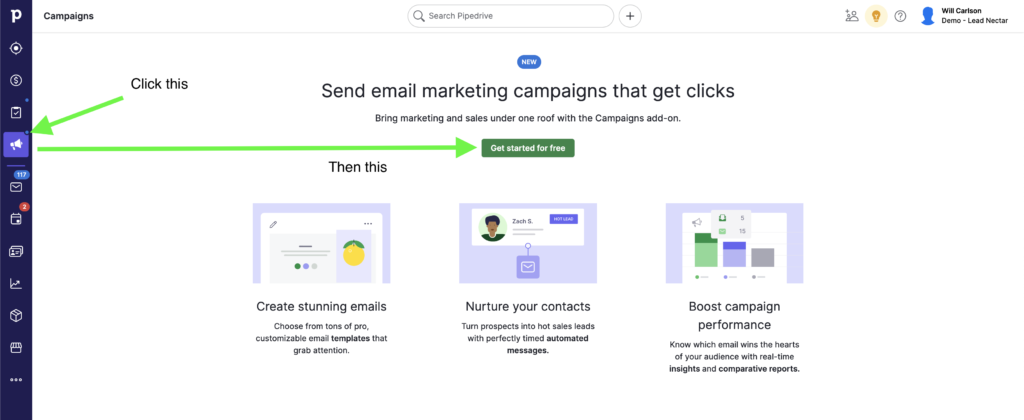
Once logged into Pipedrive, click the Campaigns section and then click Get Started for Free.
Add a Sender
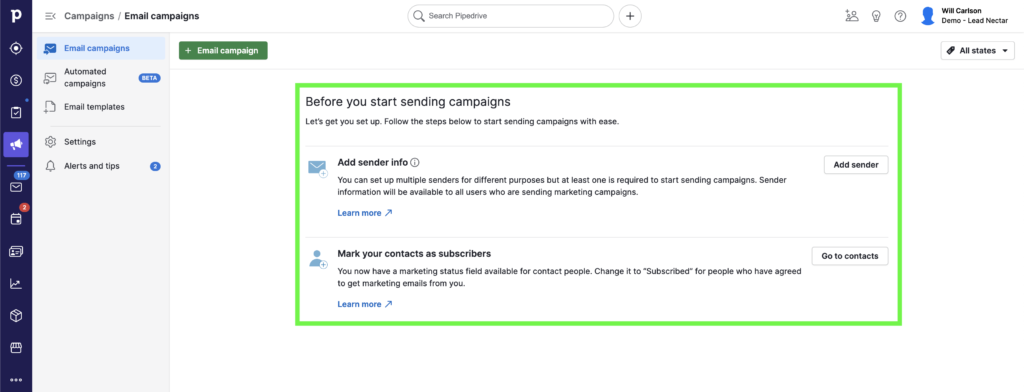
It will then ask for you to add a sender. This is the person (could be you or a colleague) who your campaign will be sent from. Click Add Sender, and input the sender’s name, email and other info. Then verify the sender.
Convert Contacts To Subscribers
Next, click Go to contacts to begin marking the contacts that have given you permission to join your email subscriber list. That will take you to the Contacts >> People page. You’ll notice two new columns now. Marketing Status and Double opt-in.
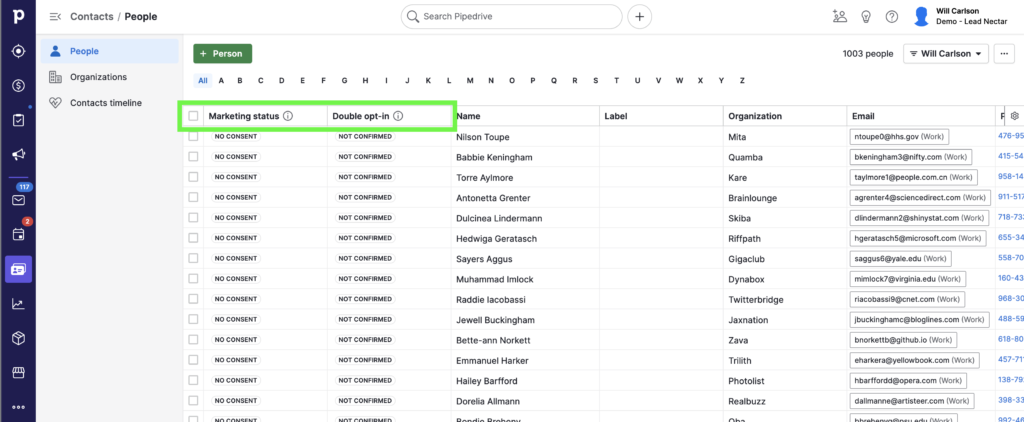
Click the “i” sign next to either of those new column names. Here’s what they say:
Marketing Status: Change marketing status to “Subscribed” for people who have agreed to get marketing emails from you. Only subscribed contacts can receive email campaigns and are available for selection when you create a new campaign.
Double Opt-In: Contacts who have confirmed their subscription to your emails have the “Confirmed” double opt-in status. Contacts who haven’t confirmed yet or haven’t received a double opt-in request at all will have the “Not confirmed” status.
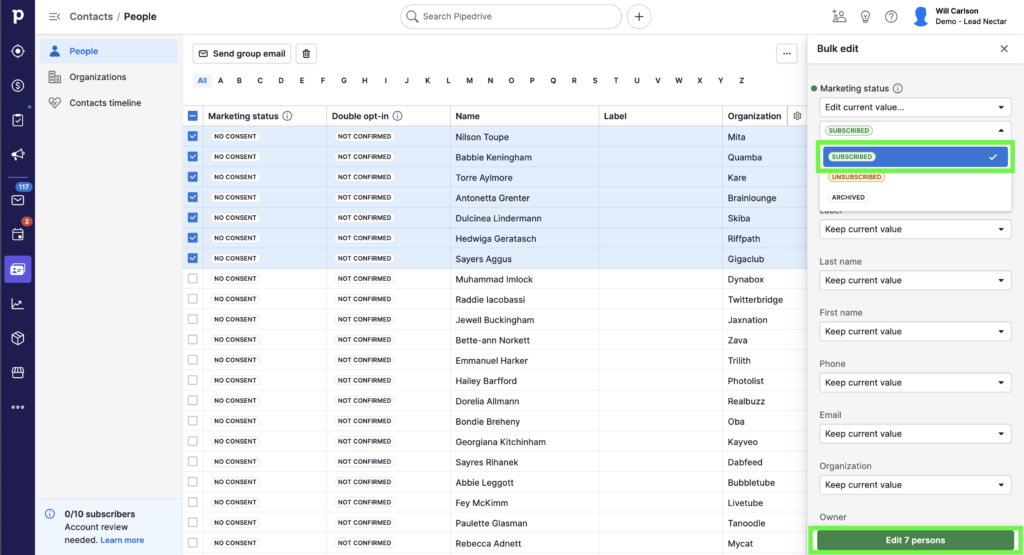
You can check the box next to each contact to add to your subscription list, and on the right side, under Marketing Status, click the drop down and choose Edit current value…
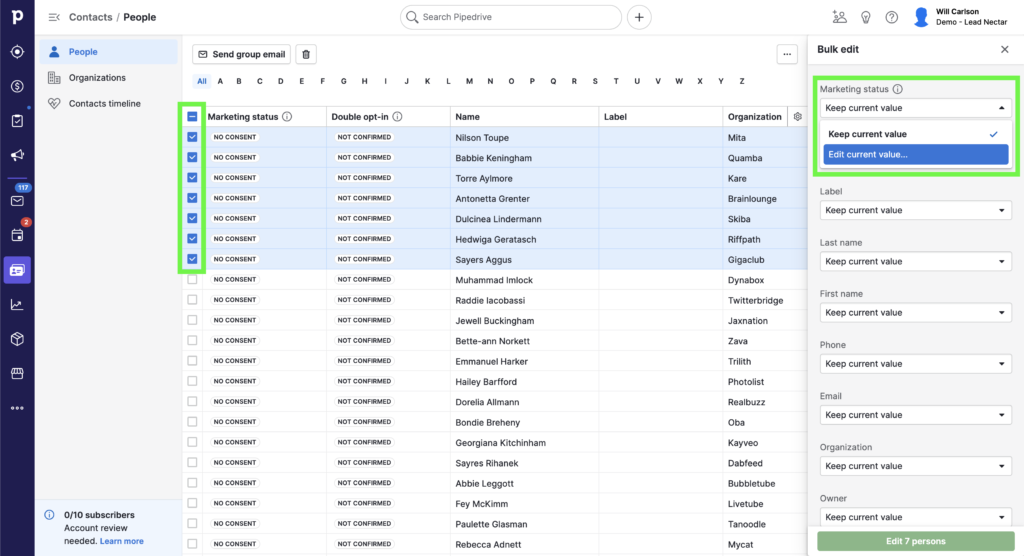
Select Subscribed to update their subscription status, then on the bottom right, click Edit persons.
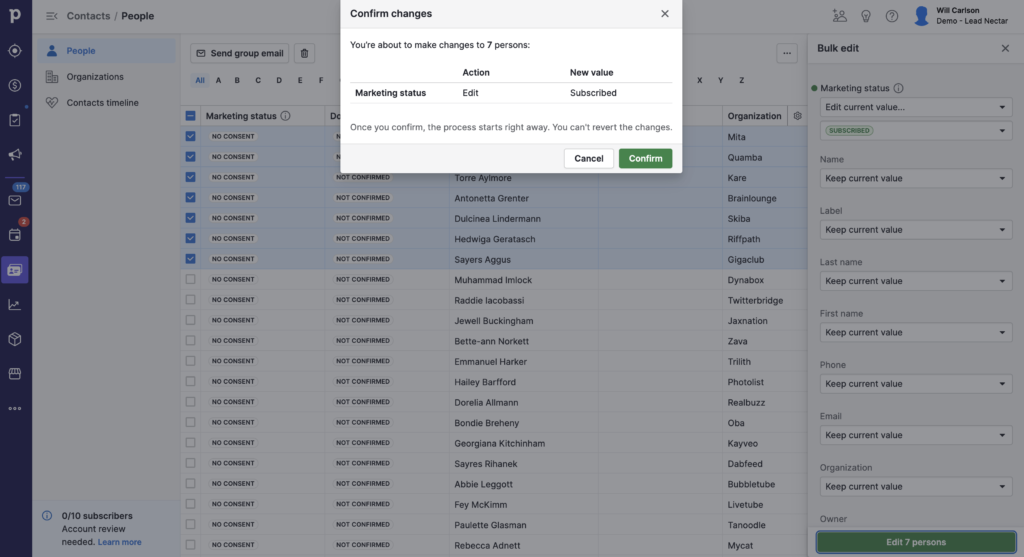
Then confirm your changes.
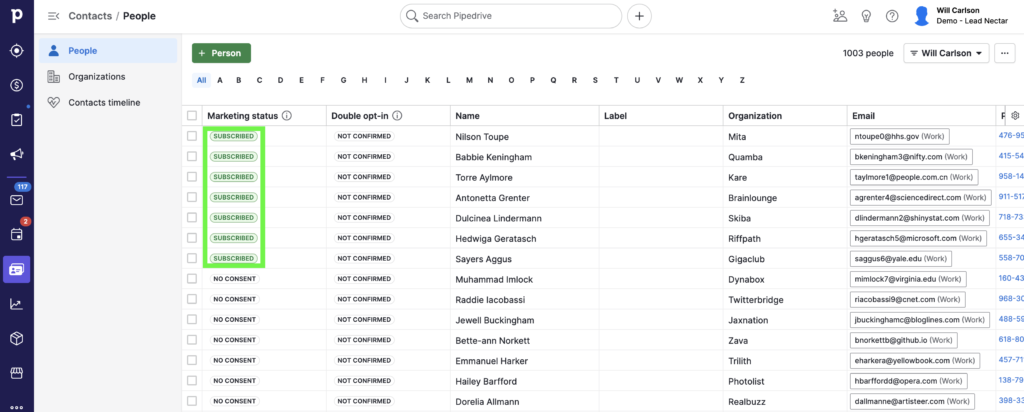
Once confirmed, you will see the contacts’ marketing statuses update accordingly.
Double Opt-In
Double opt-in is the confirmation process that requires a person to confirm their email subscription by taking a second action, like clicking a confirmation link, after initially signing up.
It is recommended as a best practice for email marketing and compliance with anti-spam regulations in many countries.
I always recommend getting double opt-in because it ensures that subscribers have given explicit consent to receive communications, helping to prevent spam complaints and improve email deliverability.
You can send a double opt-in request by clicking into the contact’s detail view (click on the name of the contact). Then next to Double opt-in, click Send request.
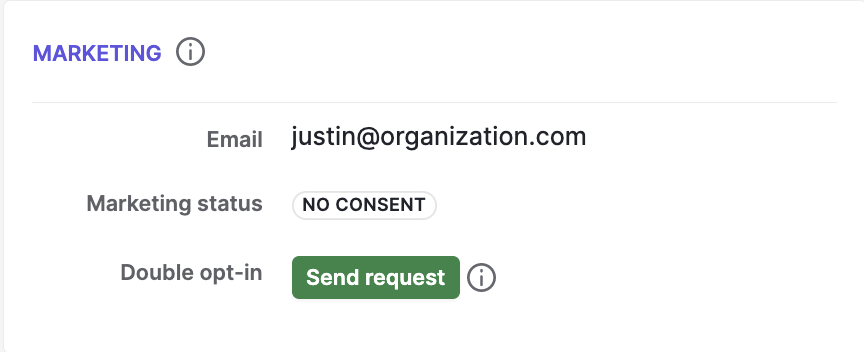
That will open up the pre-written email which you can review and then click Send Request.
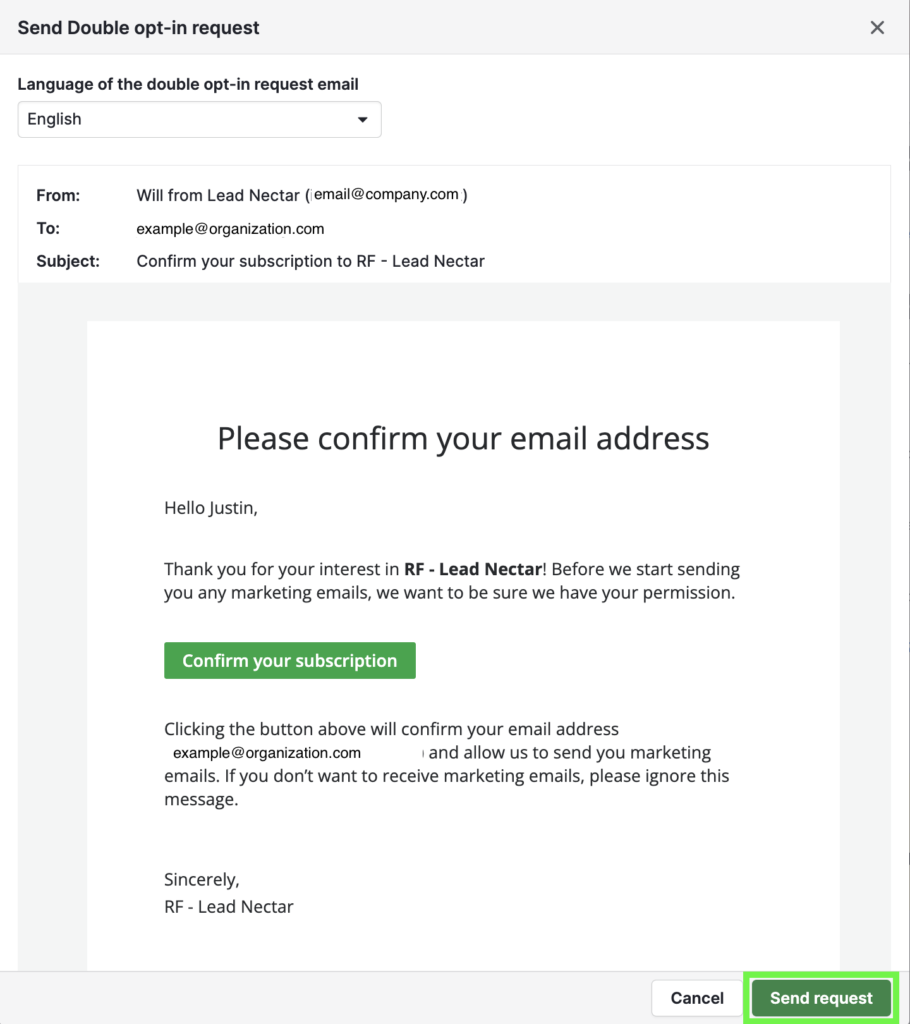
Once they confirm, they’ll be marked as a double-opt in subscriber.
Creating Your First Campaign
Now, let’s walk through setting up a campaign. Click into the Campaigns section again. Then click + Email campaign.

Choose Your Recipients
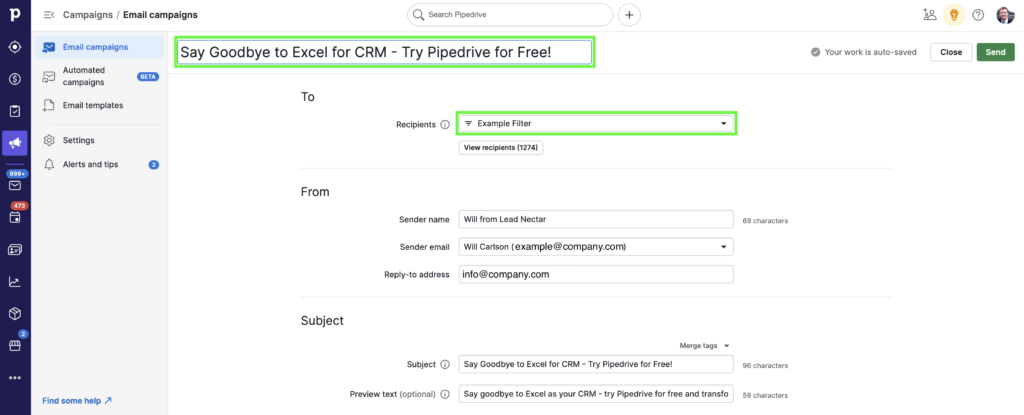
Then go ahead and give your campaign a name. Then choose your recipients by clicking the dropdown and filtering your contacts.
Choose the Sender and Reply-To Address
You can also choose Everyone, which will choose all of your subscribers.
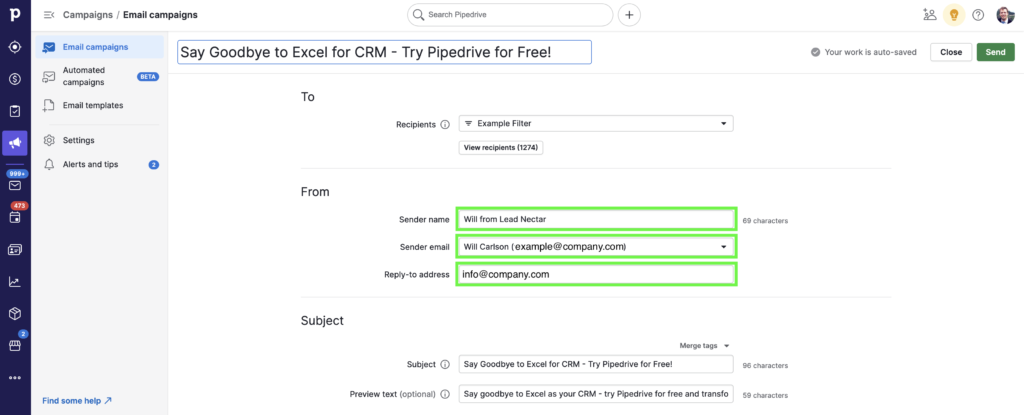
Then the From section. Choose the name of the sender, and the email from which the email will be sent. Then add a Reply-to address.
Add a Subject and Preview Text
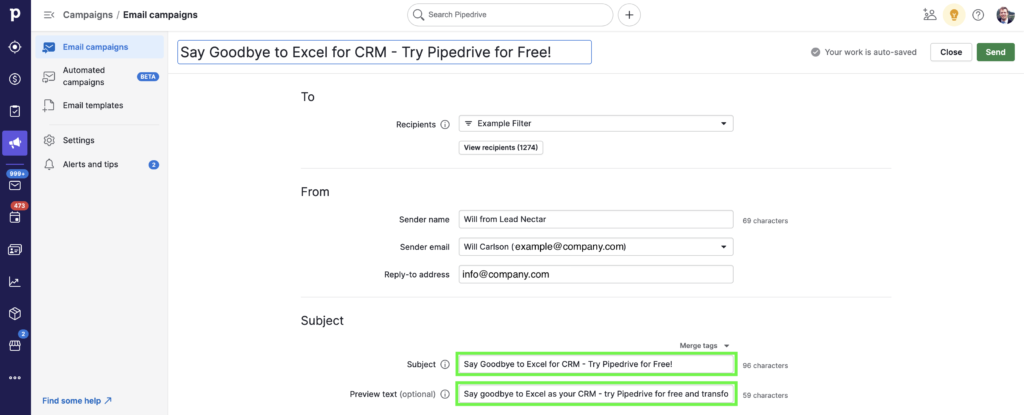
Then give your email a subject and optionally some preview text.
Choose Starting Layout
Finally for Email content, you can choose Create New.

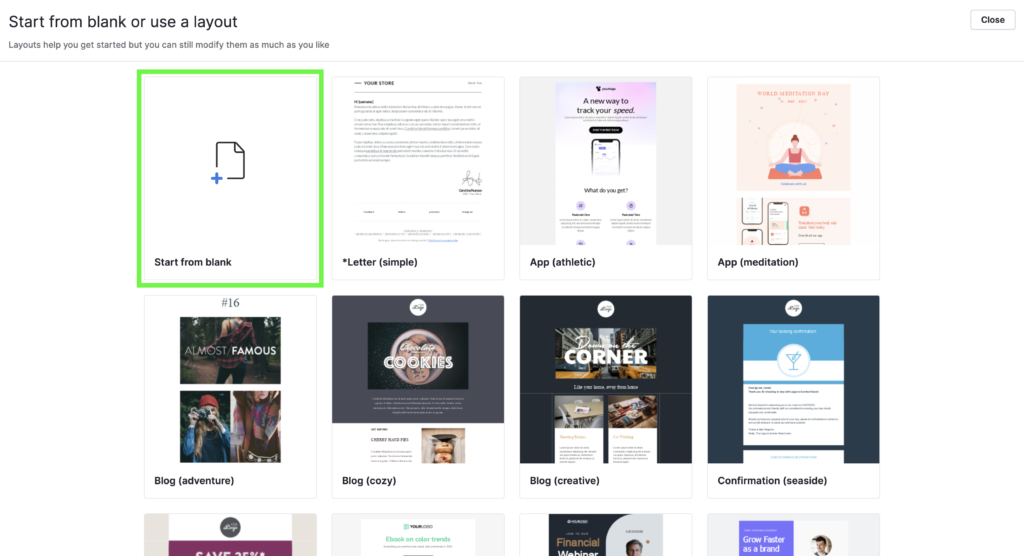
You can see the available templates, which we’ll touch on below. Just to make sure you understand how it works, I’d recommend starting with a blank one. Then you can use Pipedrive’s templates and/or make your own going forward.
Click Start from blank.
Creating Your Email Content
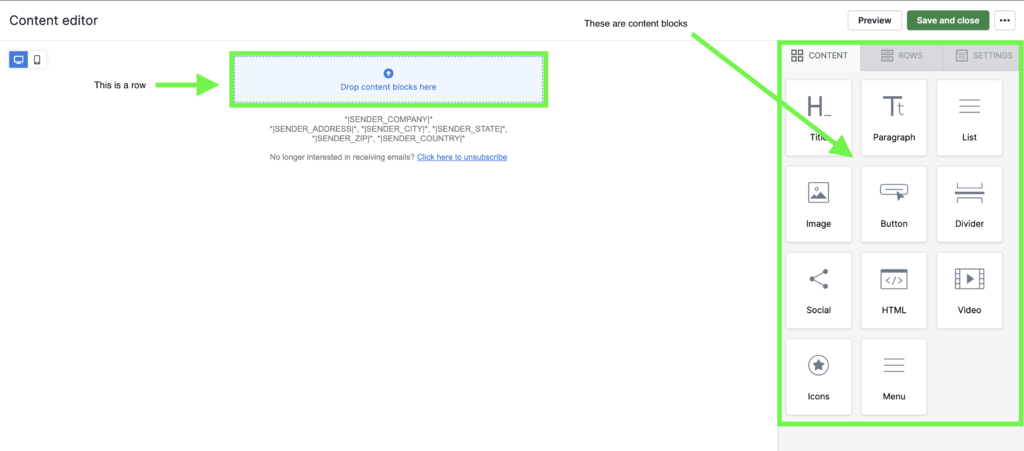
That will open up the Content Editor. At right you see 3 tabs: Content, Rows and Settings.
Content
By default, it opens up to Content. Here you can see all of the content block types available for use in your email.
At left, you have your blank canvas. The area where it says Drop Content Blocks here is an empty row that you can place content in.
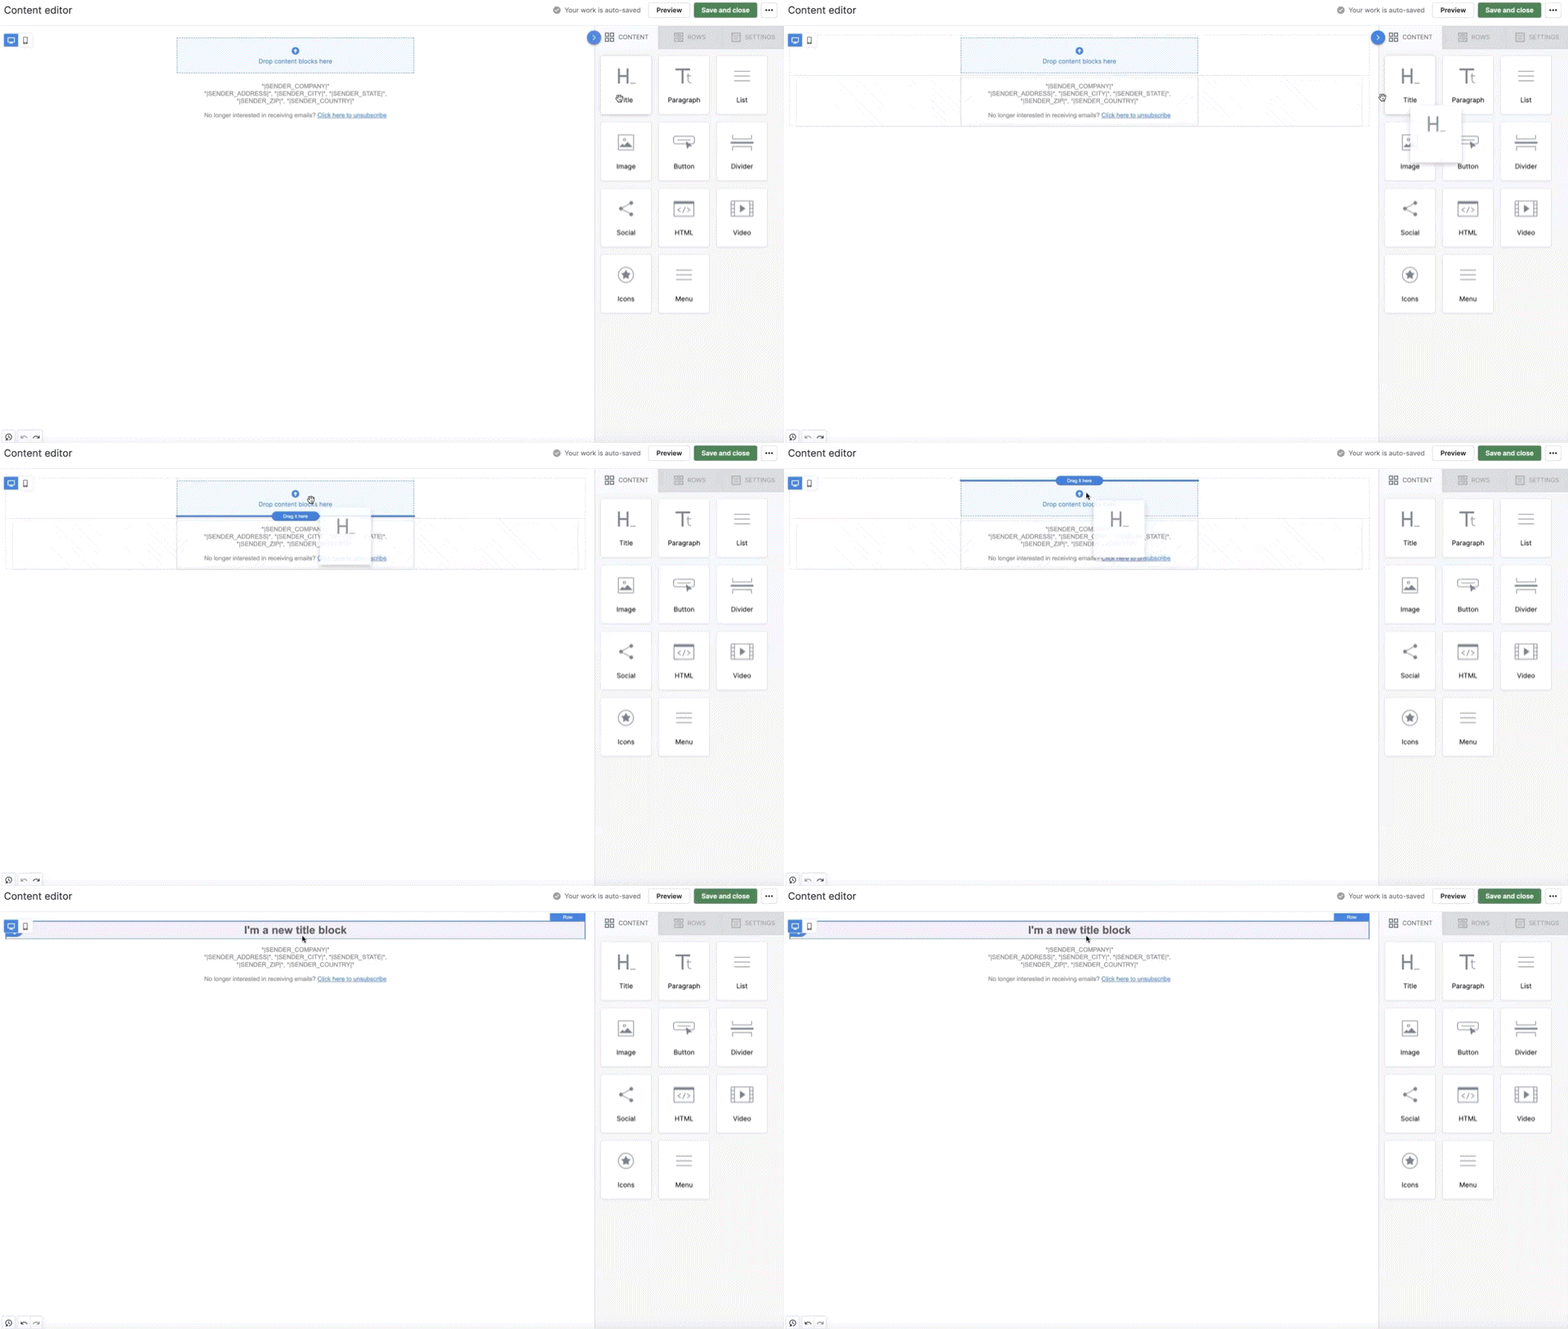
You can drag any of the content blocks from the right side Content tab into the empty row on the canvas at left.
Rows
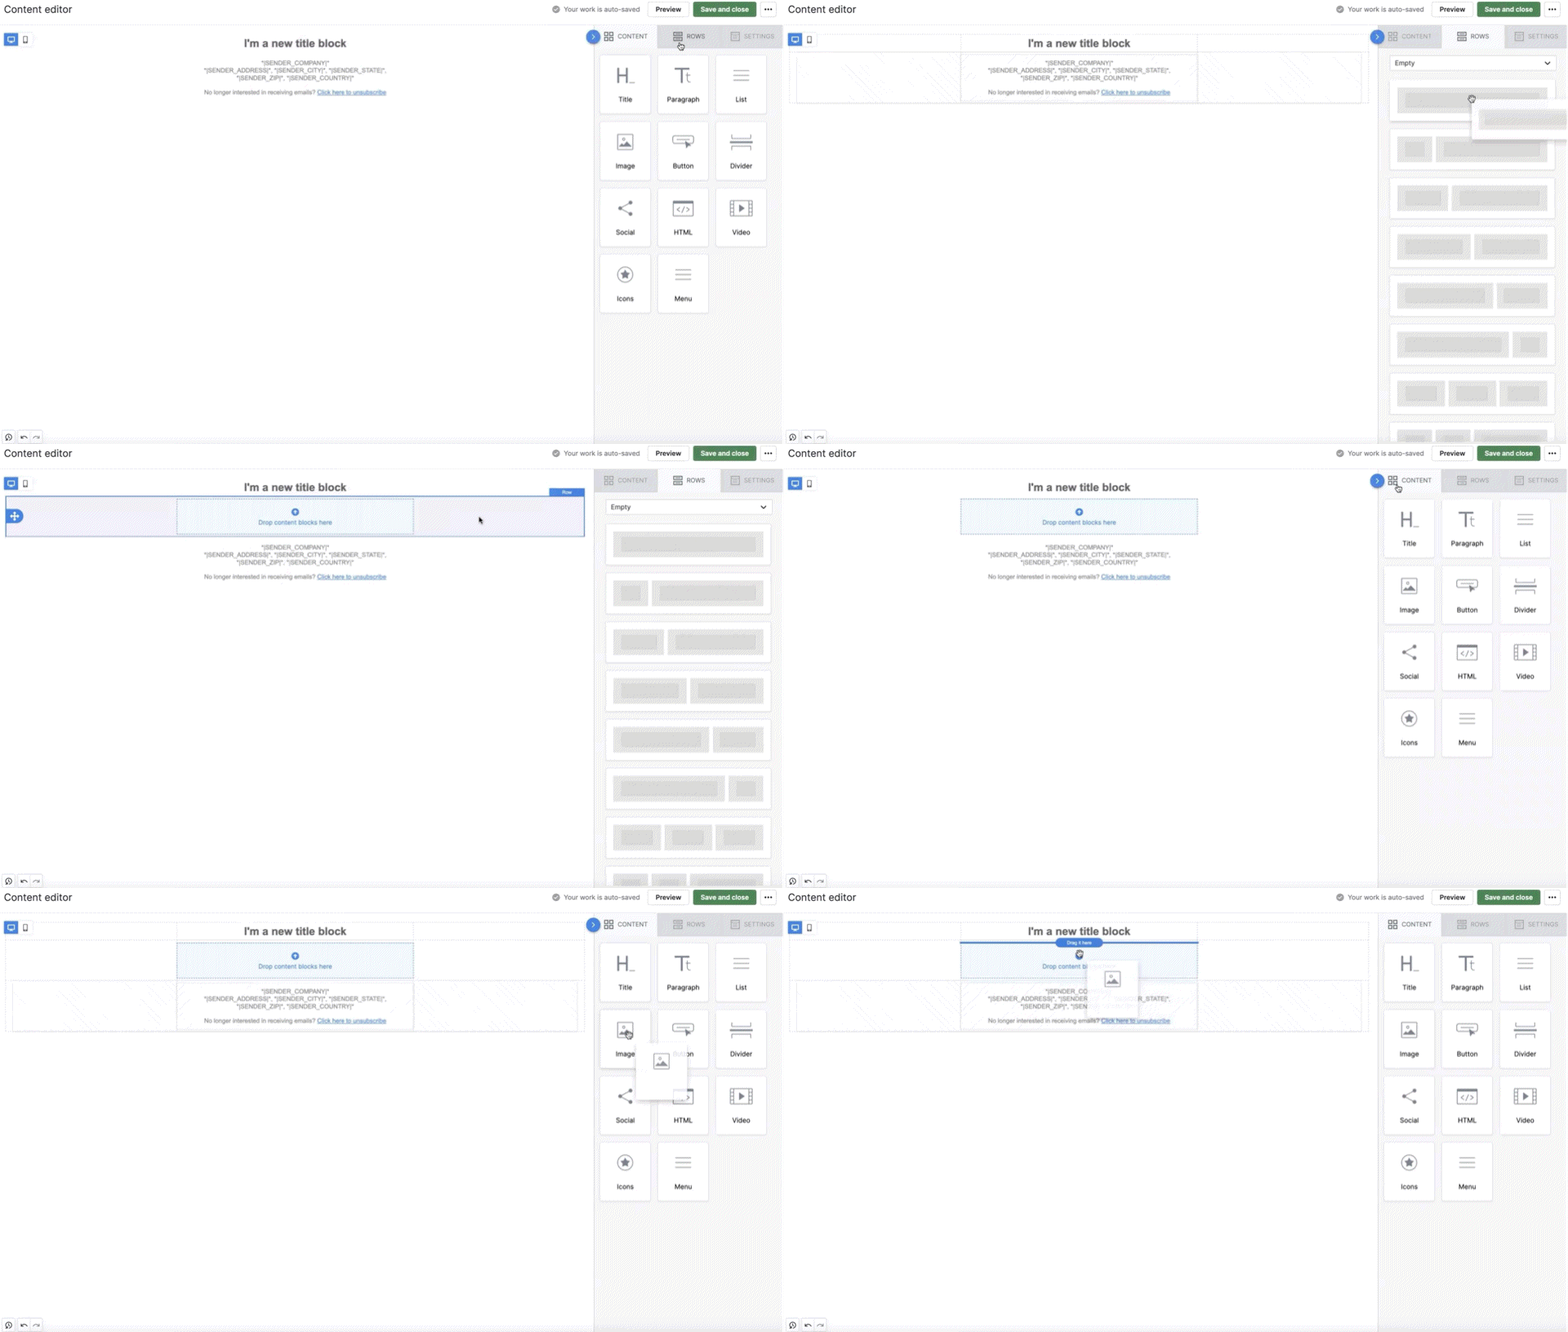
You can add additional rows by clicking into the Rows tab and dragging them into the canvas area. You can then add content blocks to those rows.
The Settings tab allows you to adjust the content area layout including its width and alignment. It also allows you to adjust colors for the background, the content area background, and for links. Finally, it allows you to change your default font.
Settings
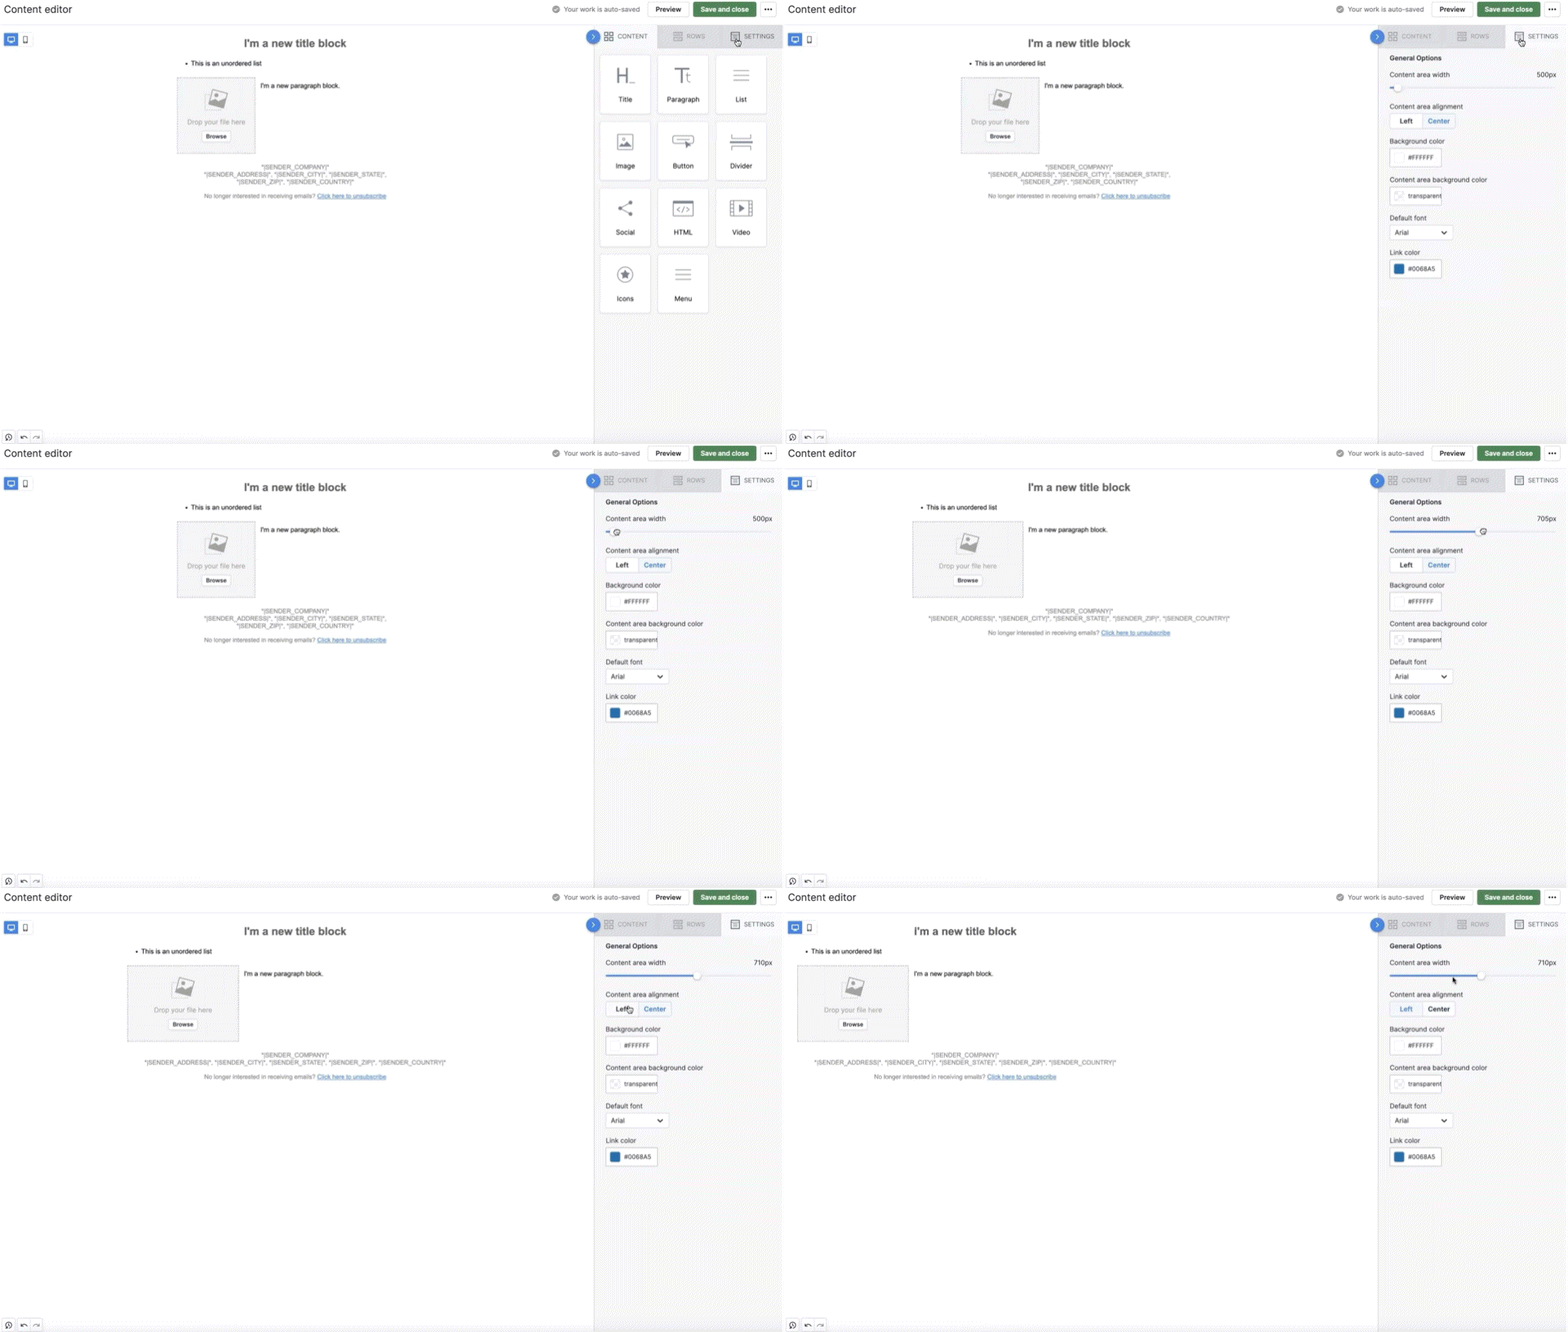
You can save your campaign to finish it later by clicking Save and close on the top right.

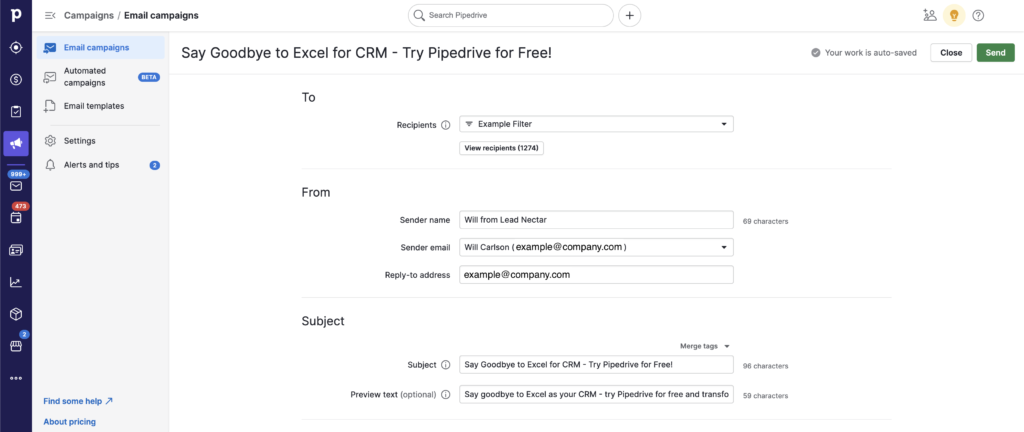
Once you’ve saved and closed your campaign, you’ll be brought back to the campaign home page.
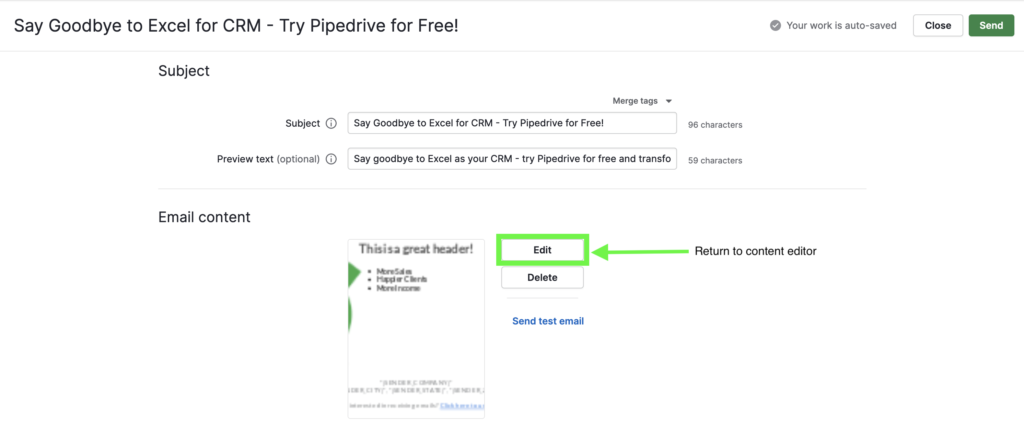
You can return to the content editor for your campaign by clicking Edit.
Using Templates
Templates can be used to increase efficiency for your because you can re-use and repurpose ready-made content.
Save as Template
You can save your campaign as a template from the content editor by clicking the 3 dots on the top right and choose Save as template.

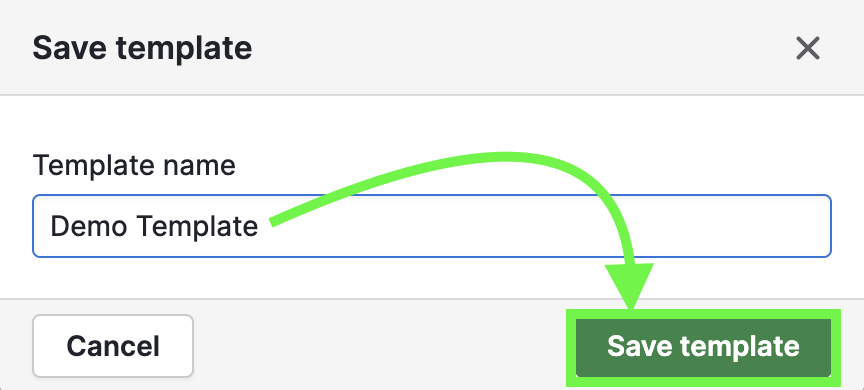
Then give your template a name, and click Save template.
Click save and close again.
Template Library
To look at Pipedrive’s pre-made templates, click Email templates.
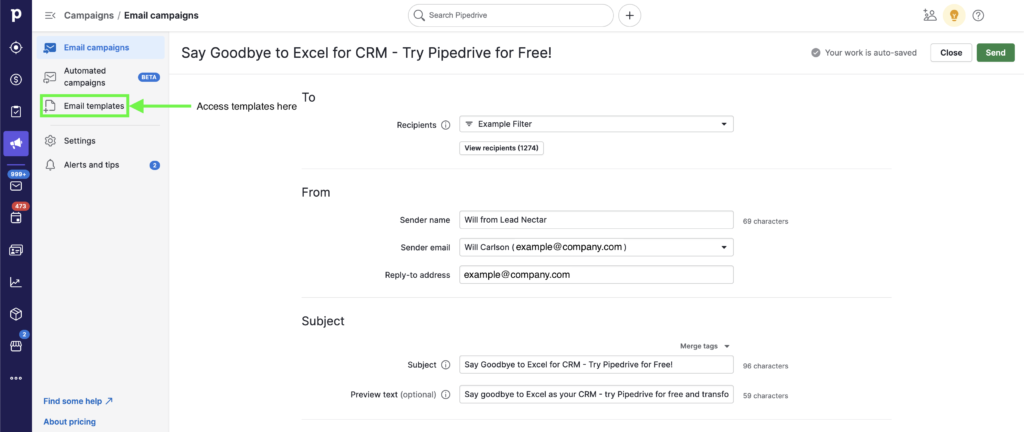
Then click + Template.

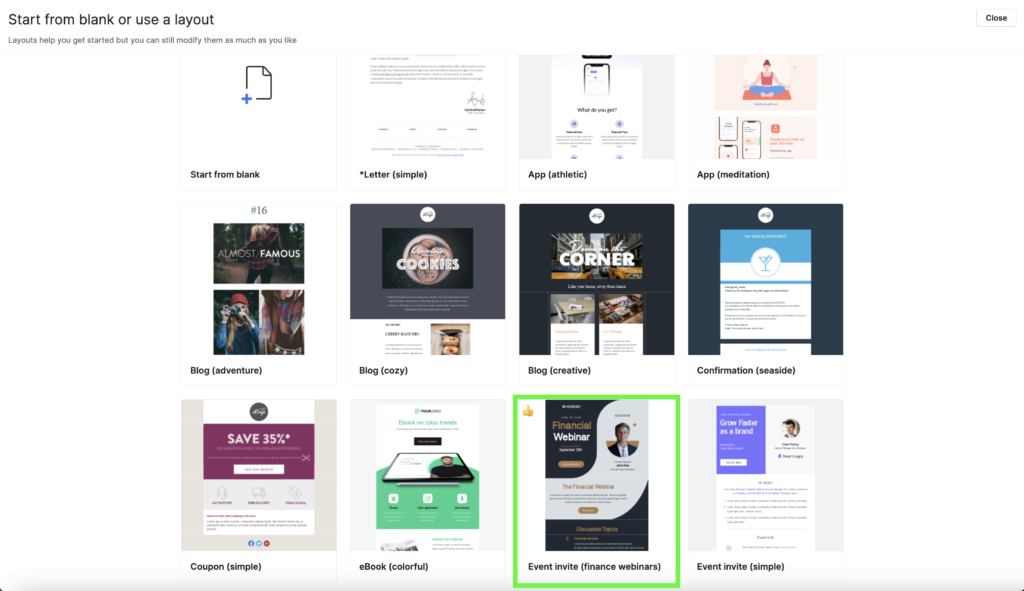
Check out all of the options in the template library. There are templates for all types of occasions including webinars and other events, product announcements, newsletters and more.
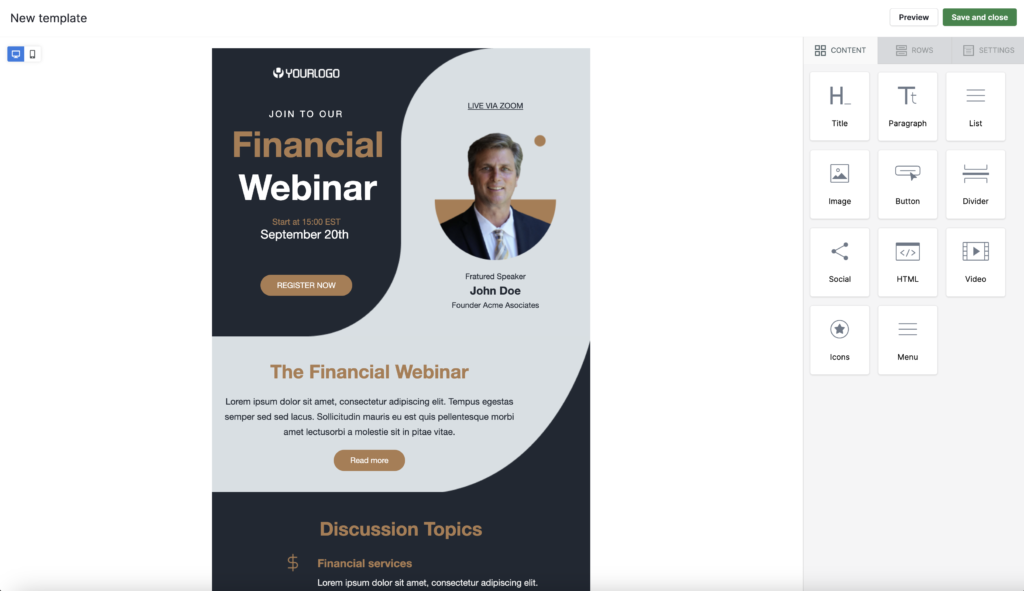
Let’s go with the Financial Webinar template. Click on it to open it up in the Content Editor.
Editing a Template
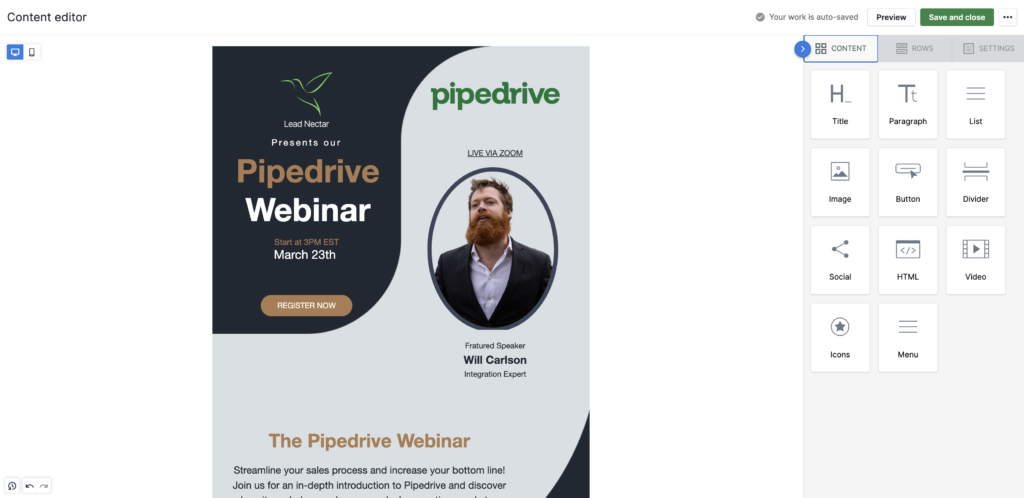
You’ll be brought back to the content editor, with the campaign already built out for you. All you need to do now is customize it to your needs.
Click into the content blocks and make adjustments to the content. Here’s an example.
Preview Your Campaign
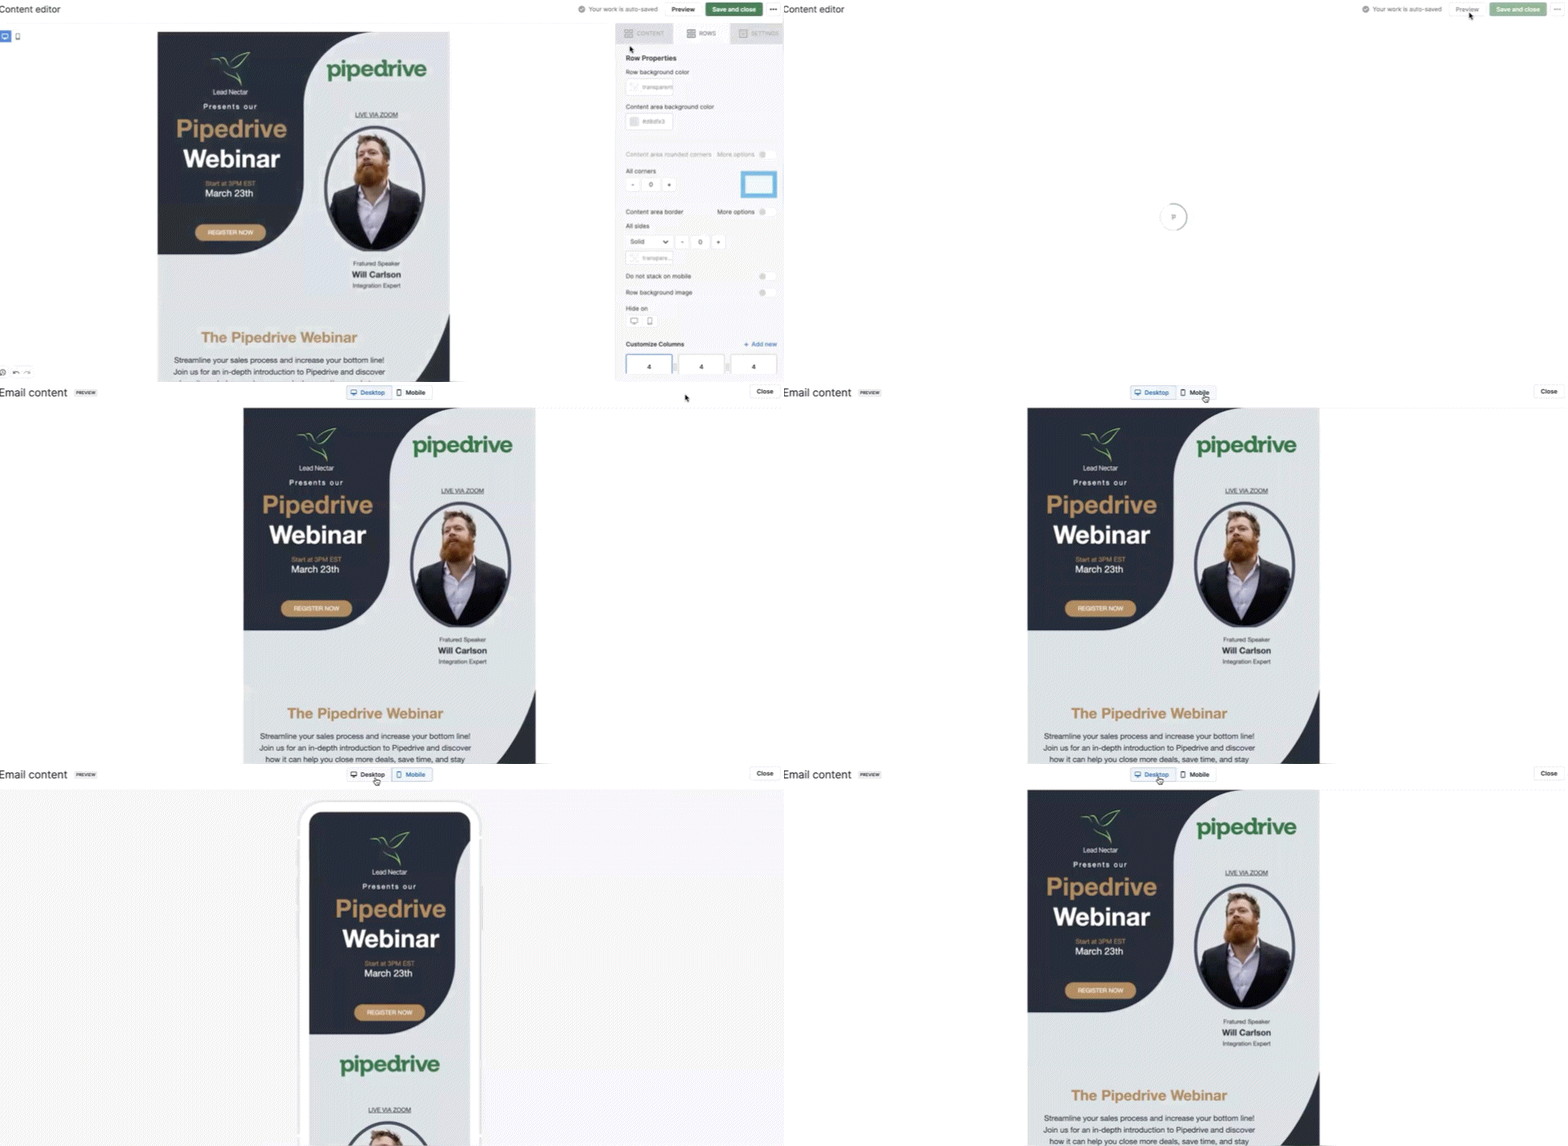
While you’re building out your content, you can preview how it looks on desktop and mobile by clicking Preview on the top right.

Test Your Campaign
Once you’ve finished your campaign content, it’s time to test it. Click Save and Close to return to the Campaign home again.
Send Test Email
Once you’ve gotten it looking as you’d like, let’s test out sending our campaign. Click Save and close to get back to the campaign home page.
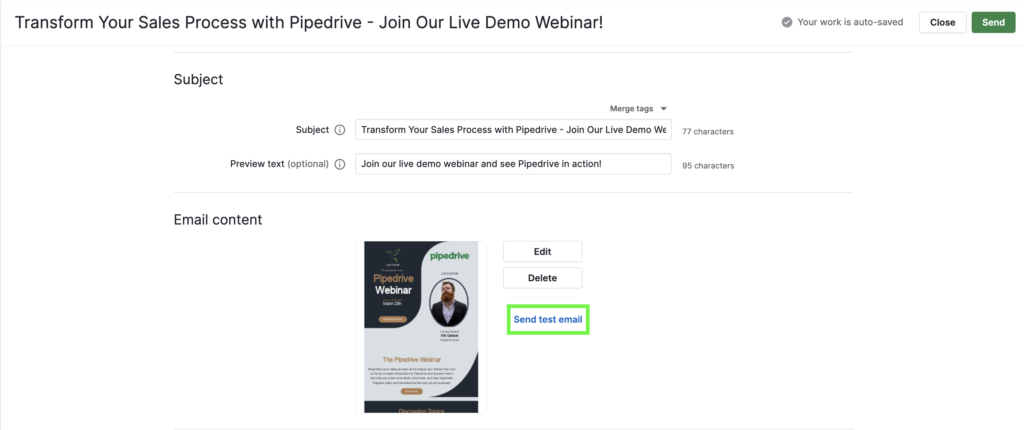
From the campaign home page, click Send test email.
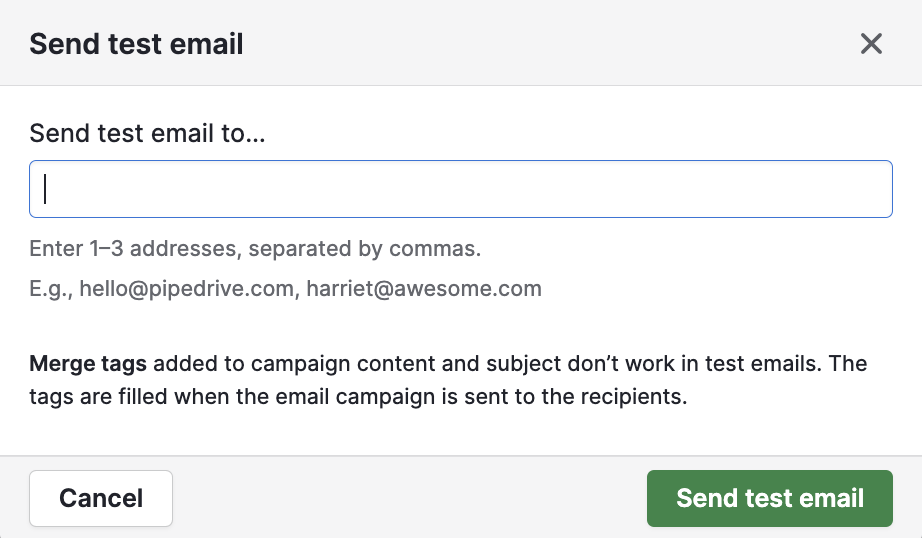
You can send it to one of your own email addresses, or to a colleague’s. Input the email and click Send test email.
Review the sent email to make sure everything’s looking good, and make any adjustments as necessary.
Scheduling Your Campaign
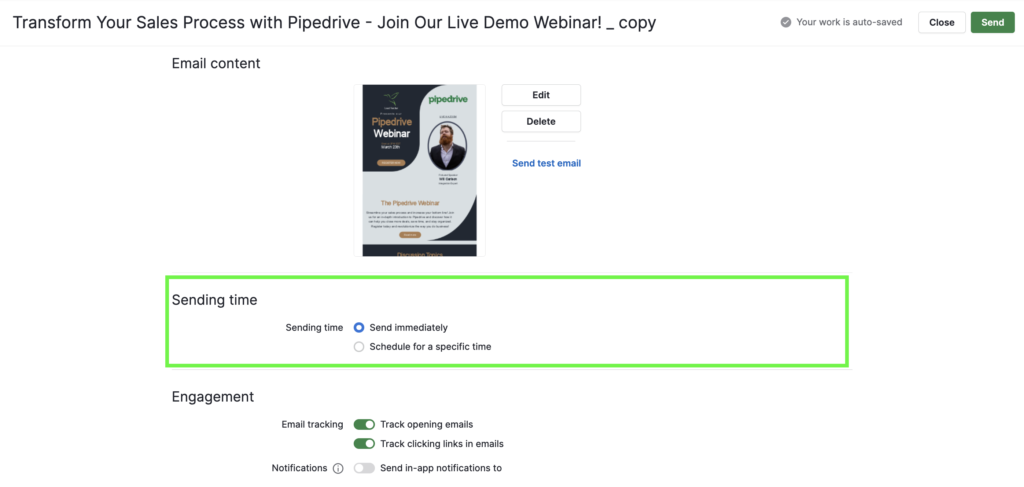
You can also specify if the email be sent immediately, or at a specific time. Scroll down in the Campaign home page and choose if you’d like to send immediately upon clicking “Send,” or if you’d like it to be sent at a scheduled time.
Engagement Tracking Settings
Make sure you’ll be able to easily track engagement by turning on Track Opening Emails and Track Clicking Links in Emails. If you’d like, you can also turn on notifications on your email’s engagement. Click the “i” sign next to Notifications to learn more about how that works.
To do so, scroll down and click the radio buttons next to each accordingly.
Sending Your Campaign
Ok, let’s take it live! I’ll switch it back to “Send immediately” for the demo.
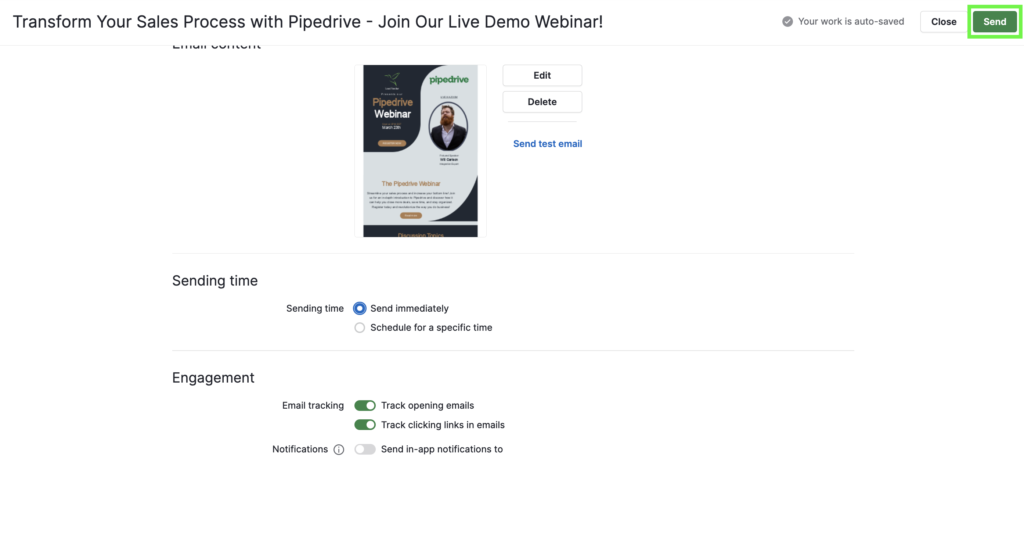

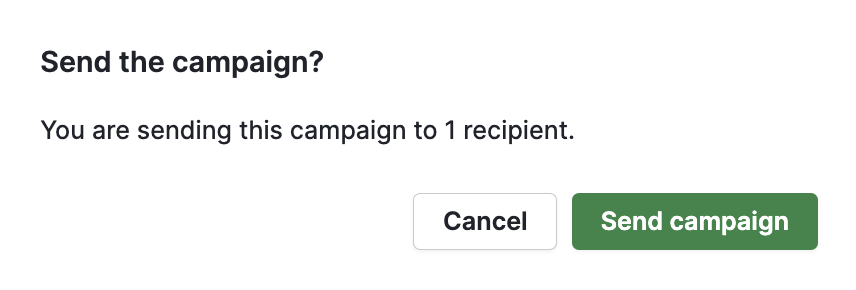
At the pop-up, click Send Campaign.
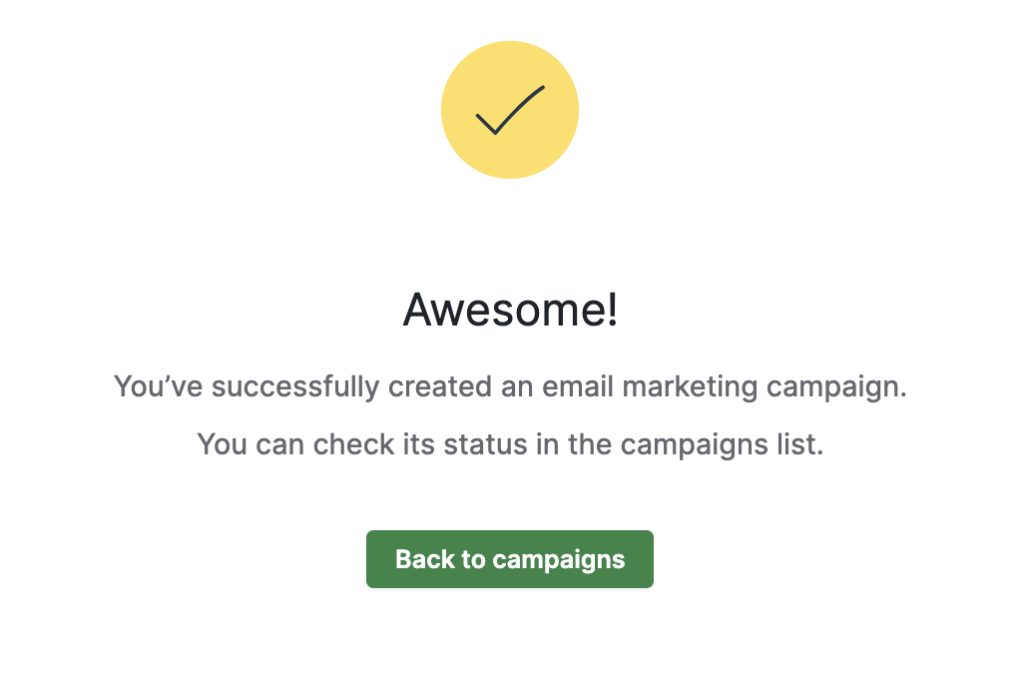
You’ll then get a success pop-up like below.
Checking Campaign Status
Click Back to Campaigns to check its status.

Once sent, status will turn green and say sent. It will then display the total emails delivered, , as well as your open and click rate:

Campaign Engagement Analytics
Click on the campaign to see the campaign overview page.
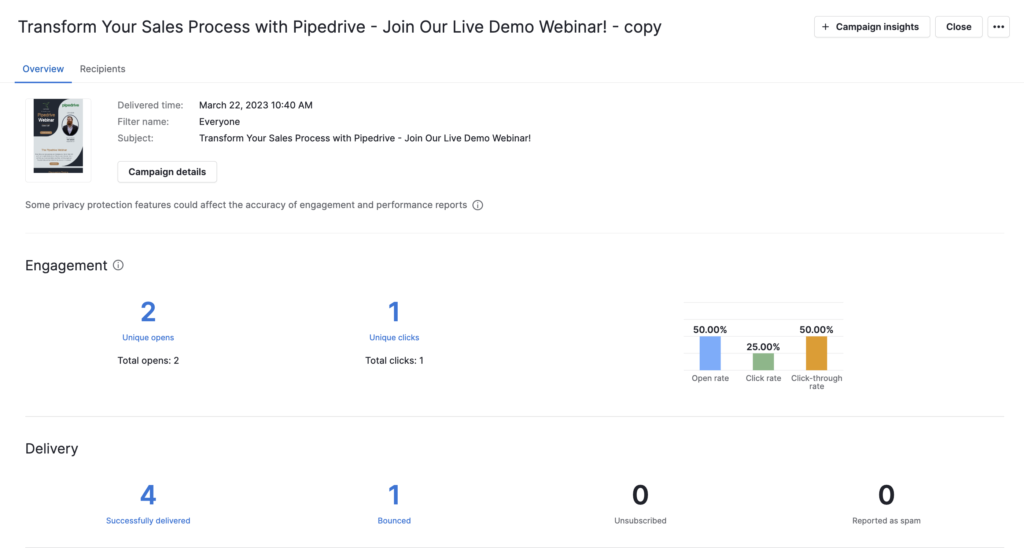
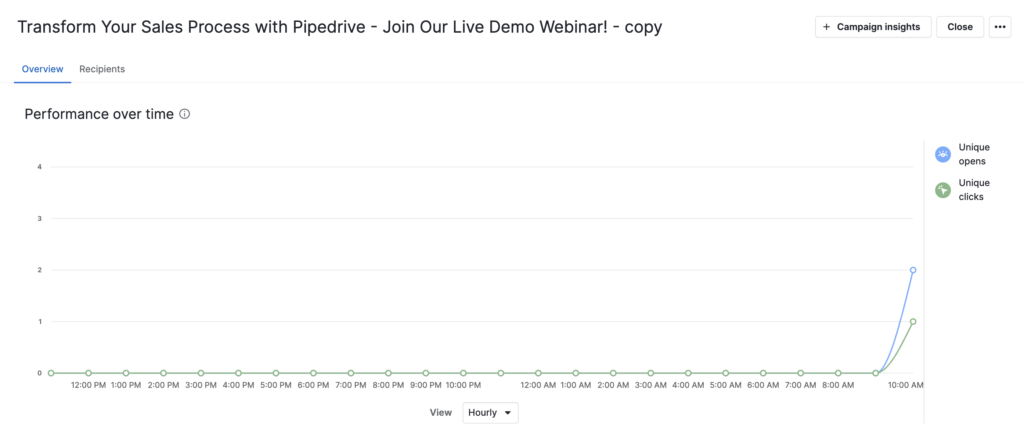
Scroll down and see your performance over time:
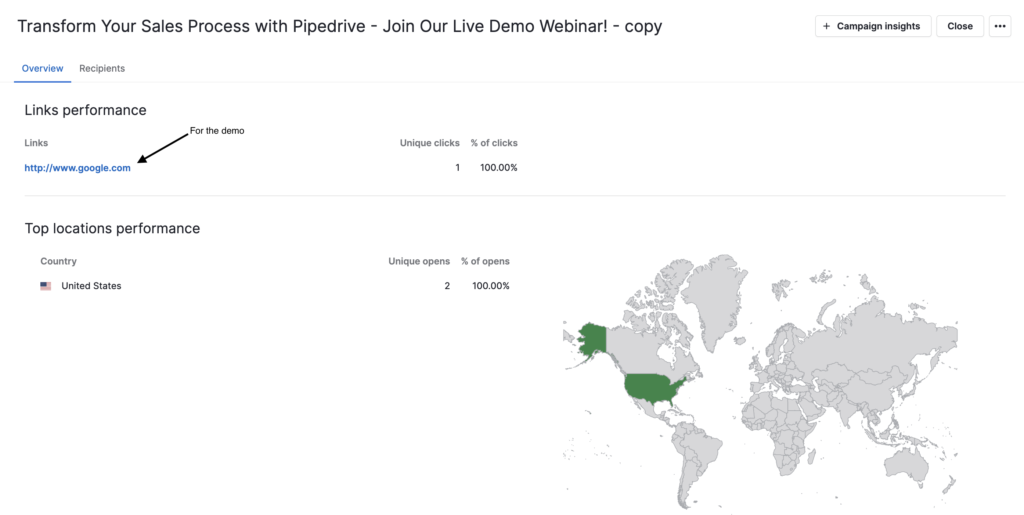
Scroll down to see engagement by location.
To see the details on the recipients, scroll up and click Recipients. Here you can drill into the specifics behind the stats.

Campaign Insights
For further analysis, you can use the Insights feature with your campaigns. Click + Campaign Insights on the top right to access that.

You can learn more about the Insights feature here.
Conclusion
At this point, you should be well on your way to building your own amazing email campaigns with Pipedrive. Keep experimenting with different email campaigns and monitoring your results to continue improving your marketing strategy. Remember, effective communication with your customers is key to building lasting relationships and growing your business. Once you’ve gotten the basics down, you can begin setting up automated drip campaigns – stay tuned for future blog posts!
