Introduction to Pipedrive, ChatGPT & Slack Integration with Zapier
Have you been just waiting to integrate GPT-4 with your CRM? You’re likely looking for a powerful way to streamline your sales process, improve team communication, and save time. Well, you are in the right place.
In this post, I’ll walk you through step-by-step how to integrate Chat GPT, Pipedrive, and Slack using Zapier, to automatically send summaries of new leads to your sales team, with calls to action, so that the team can nurture the prospect through your pipeline.
What I love about this automation is that it allows you to leverage the power of AI with your own first party data, empowering you to close more business! Sounds pretty cool, doesn’t it?
And as a bonus, I have an exclusive free gift just for our newsletter subscribers!
If you aren’t already, subscribe below and I will send you this pre-built Zap right now. That way you can just plug it into your system without having to build it from scratch!
Download This Zap
Whether you’re new to sales automation or are a seasoned expert, you will find valuable insights and practical tips to help you revolutionize your sales outreach with the power of AI and CRM integration.
So, let’s dive in and reap big rewards by integrating Chat GPT, Pipedrive, and Slack with Zapier!
About the Tools
Pipedrive: Pipedrive is a user-friendly, customizable CRM platform designed to help businesses efficiently manage their sales pipelines and track leads throughout the sales process. Try Pipedrive free for 30 day with my link.
ChatGPT: ChatGPT is a state-of-the-art language model by OpenAI that uses advanced AI technology to generate human-like text, making it perfect for crafting engaging and informative lead bios.
GPT-4 is OpenAI’s recently released natural language processing model that excels at generating human-like text, enabling a wide range of applications across diverse topics and contexts. It’s predecessor is GPT-3.
Slack: Slack is a powerful team collaboration tool, enabling streamlined communication and file sharing within and across teams, making it an ideal platform for distributing lead bios to your sales staff.
Zapier: Zapier is a versatile automation platform that enables seamless integration and data transfer between various apps and services, empowering you to create automated workflows that save time and boost productivity.
How This Works
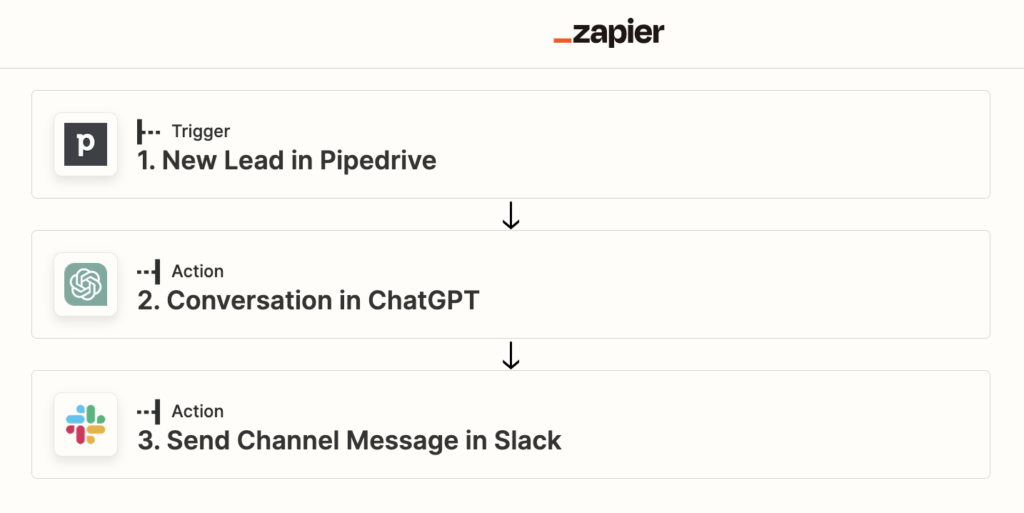
We’ll create a 3-step automation in Zapier that will do the following:
Trigger: The automation will trigger when a new lead is created in Pipedrive CRM.
Action: CRM data from the new lead will be sent to a conversation with Chat GPT (GPT-4), prompting it to write a short, accurate bio and CTA for our sales team
Action: The bio will be sent to eh sales team via the Slack channel of our choice.
Let’s get started!
Step 1: Set Up Pipedrive Trigger
Log in to your Zapier account, or create a new one if you haven’t already. Then click Create Zap on the top left corner.

This opens up the Zap editor to the trigger step, where we can choose the first app that will trigger our automation. In our case, we’ll use Pipedrive.
In order to do this step, you need to have a Pipedrive subscription. If you don’t have one, sign up free for 30 days without having to input your credit card info! Then come back and let’s complete this automation.
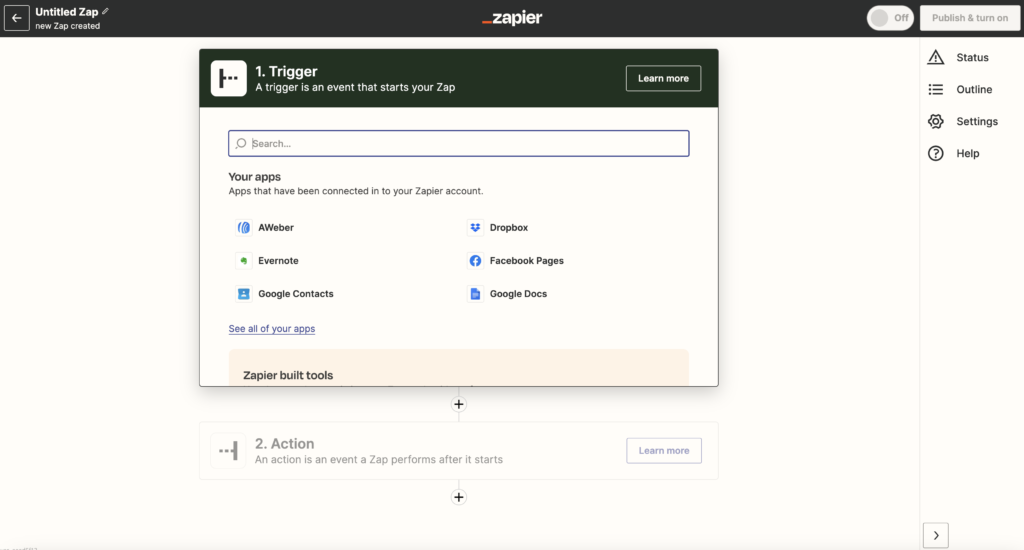
1. In the search box, type Pipedrive and choose it from autocomplete.

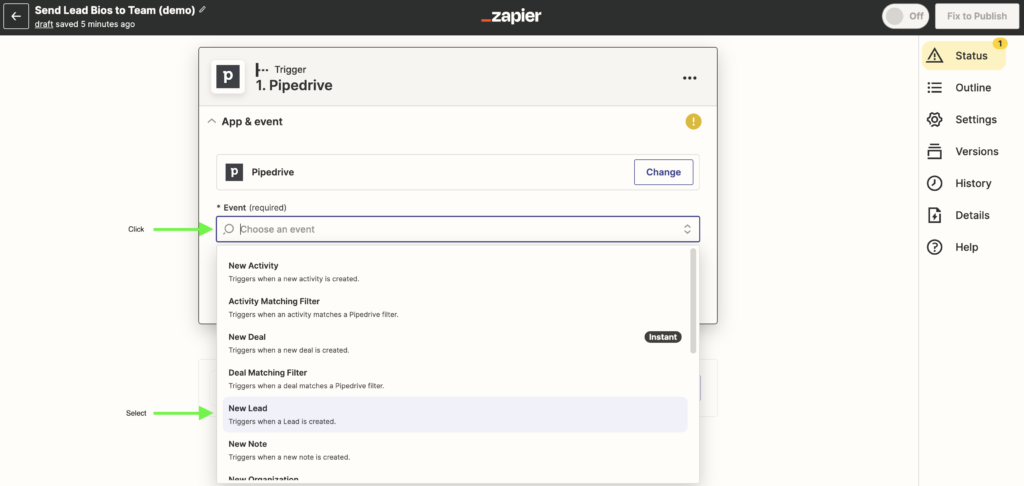
2. Choose “New Lead” as the trigger event.
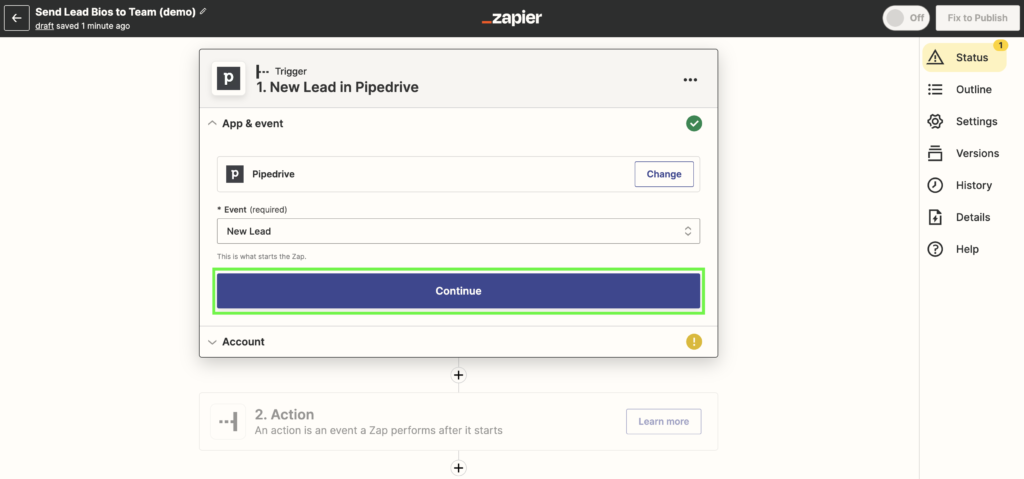
Then click “Continue.”
3. Connect your Pipedrive account. Click “Sign in.”

That prompts you to enter your Pipedrive credentials, so input your login and password and click “Log in.”
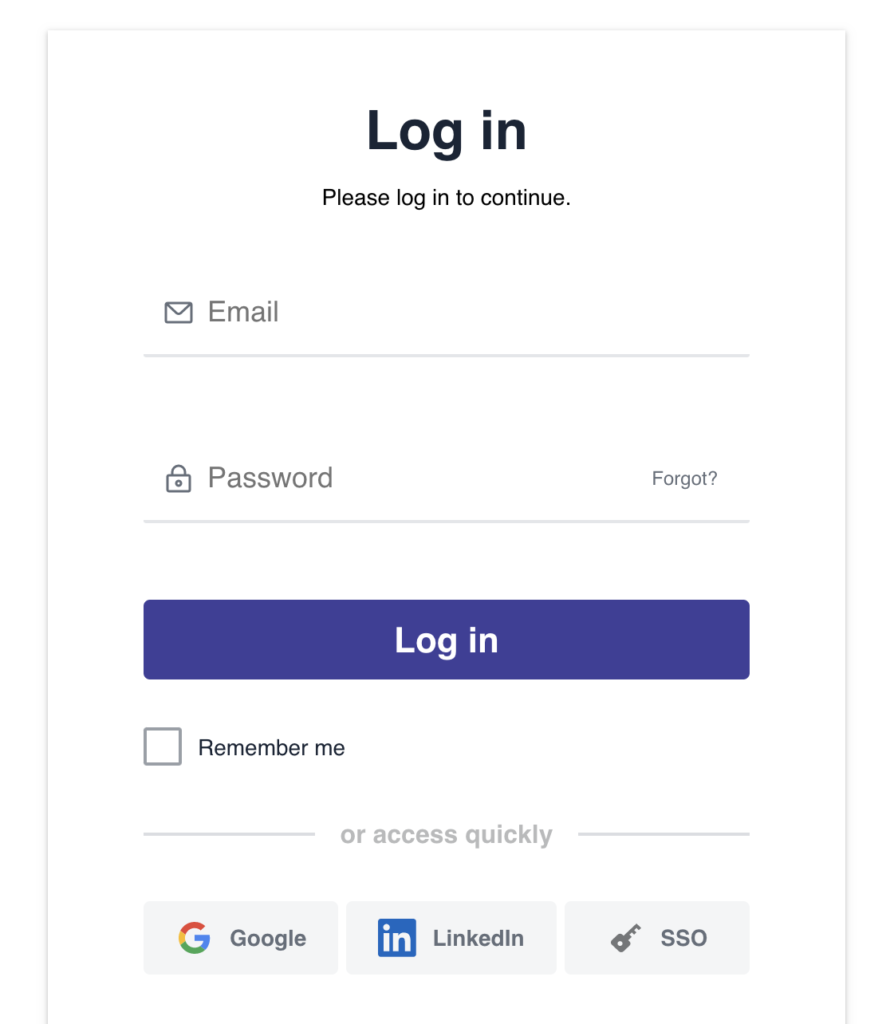
When prompted, click “Allow and Install.

Once installed, it will show as connected, and you’ll see the green check mark appear to the right of “Account.” Great! Click Continue to move to the testing stage of your trigger
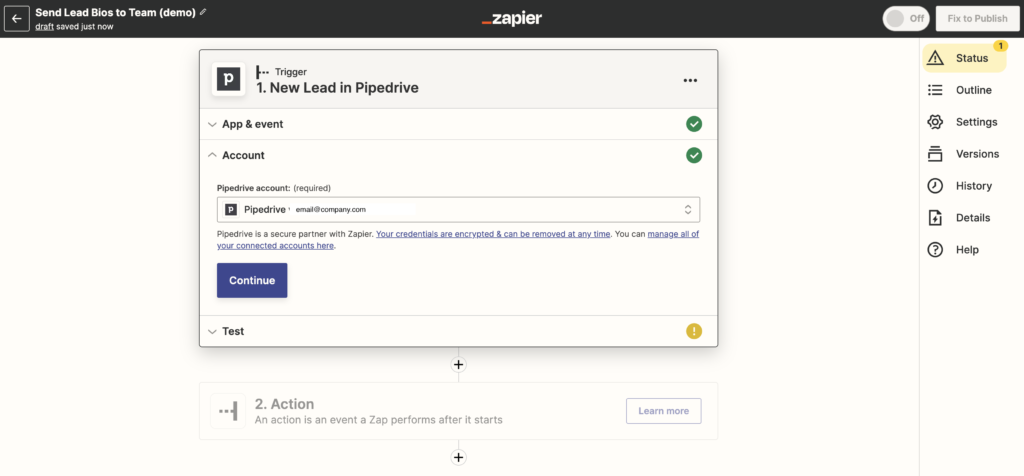
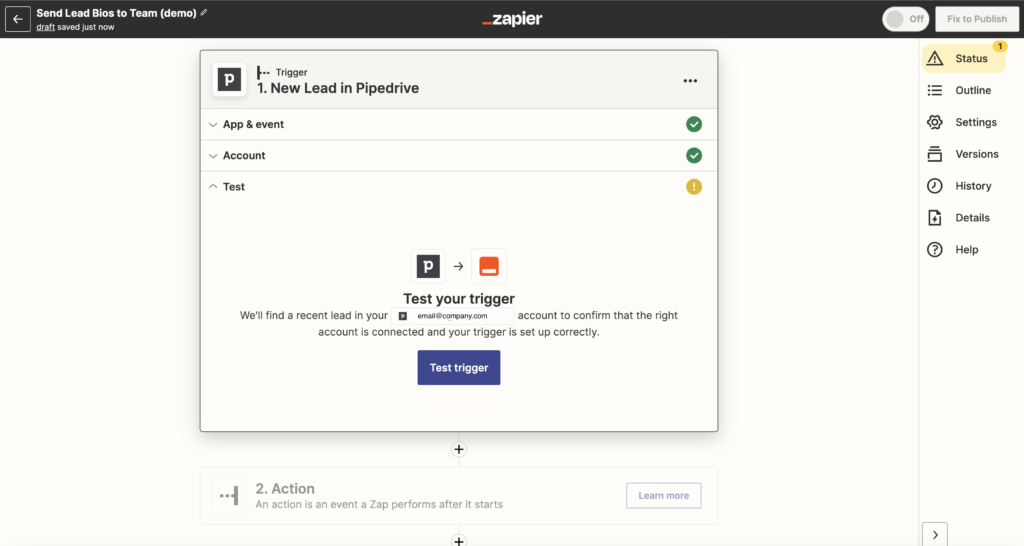
4. Test your trigger by clicking “Test trigger.”
If you have a lead already in Pipedrive, you’ll see it appear from your test!
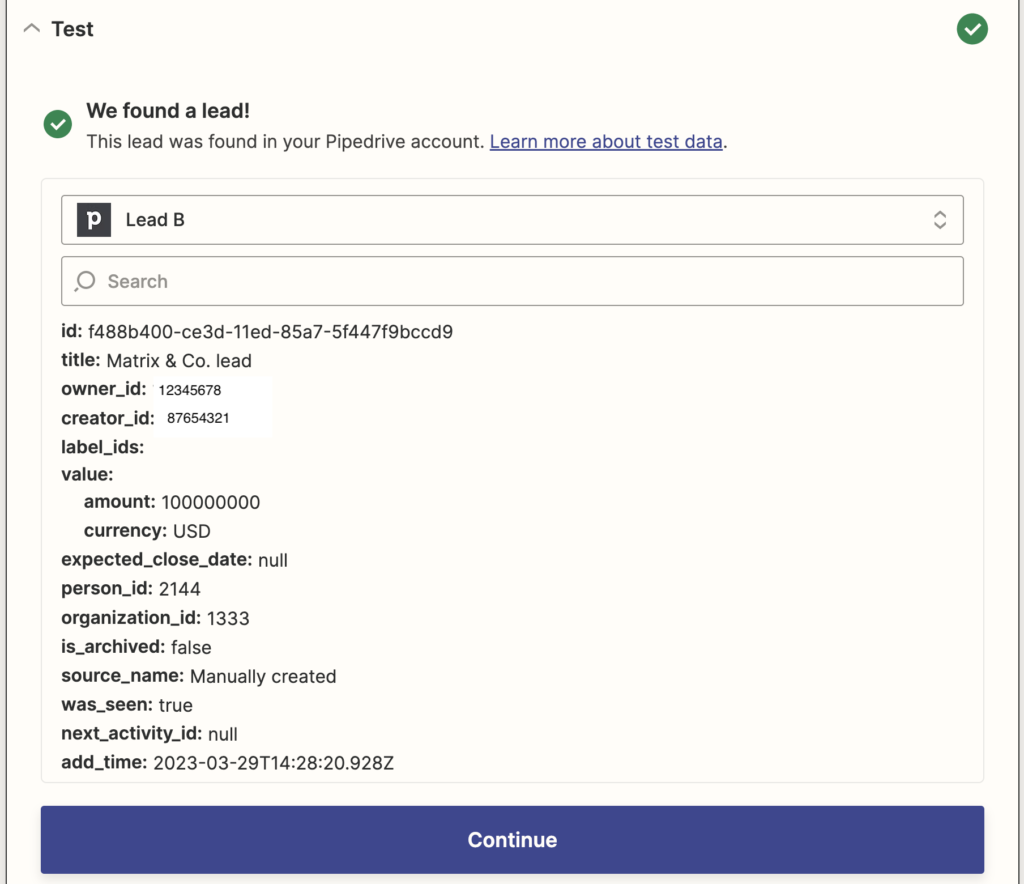
Click Continue to get started on the next step!
Step 2: Set up Chat GPT Action
I’ll break this step into a few sub-steps.
1. Type GPT in the search box and select “Chat GPT.” Note, Chat GPT is available for Chat GPT Plus subscribers (accesses GPT-4). If you do not have Chat GPT Plus, you can use GPT-3. This blog post gives an example of using GPT-3 with Zapier.

2. Select “Conversation” as the action event and click “Continue.”

3. Sign in or connect to your Chat GPT account.
If you haven’t yet connected your Chat GPT account to Zapier, follow these steps:
i. Click Sign In
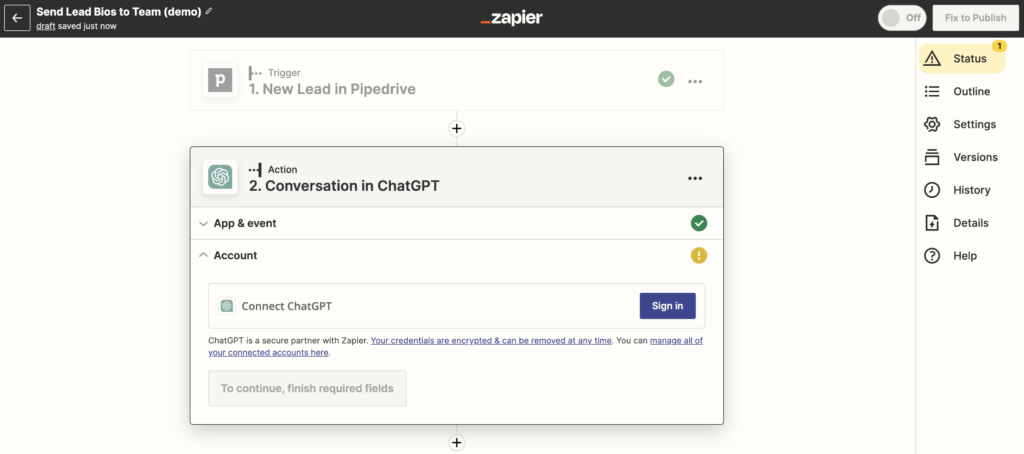
That opens up this window:
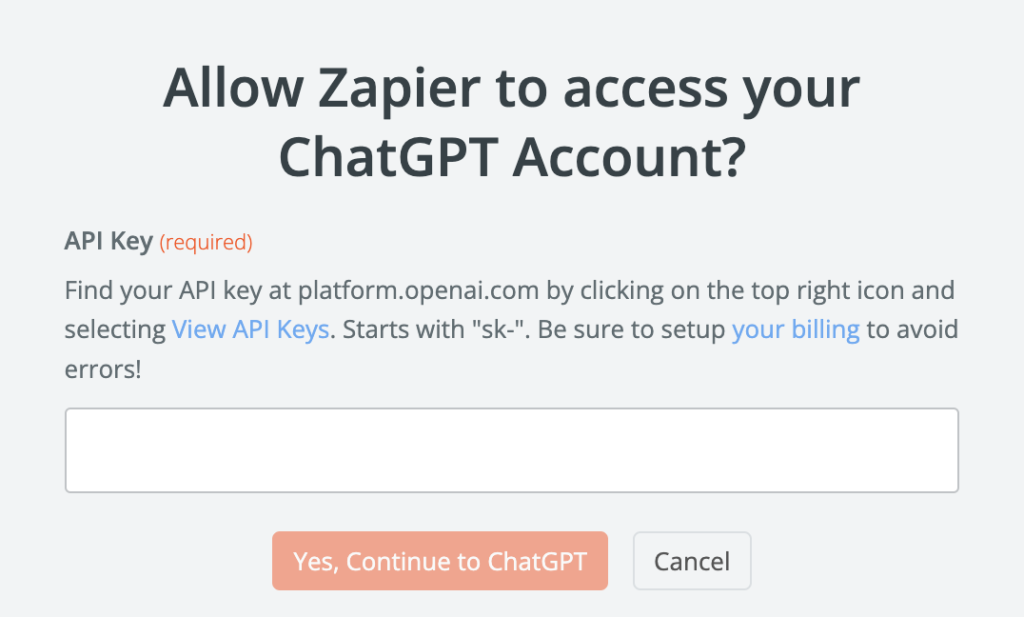
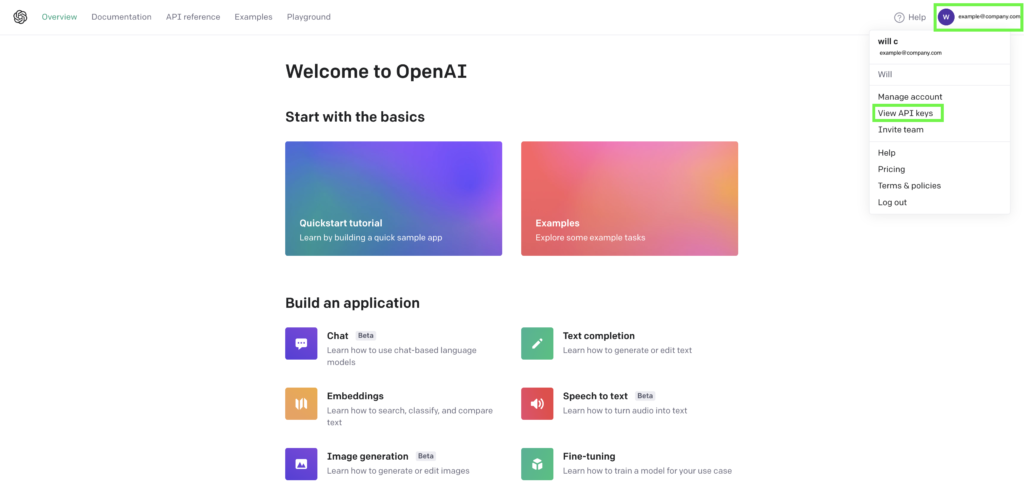
ii. Get your Chat GPT API Key: In another window to https://platform.openai.com/ and log into your Chat GPT Account. On the top right click your profile icon >> View API Key.
Click “Create new secret key.”
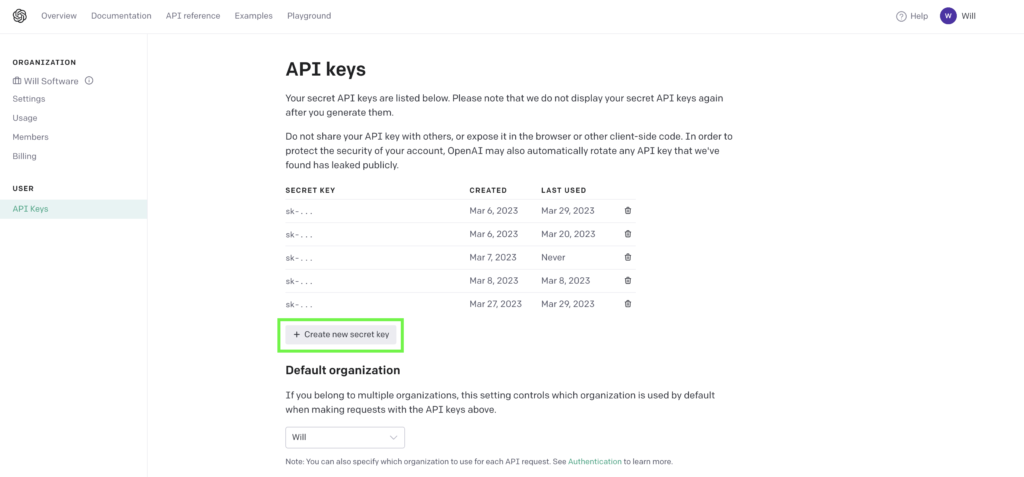
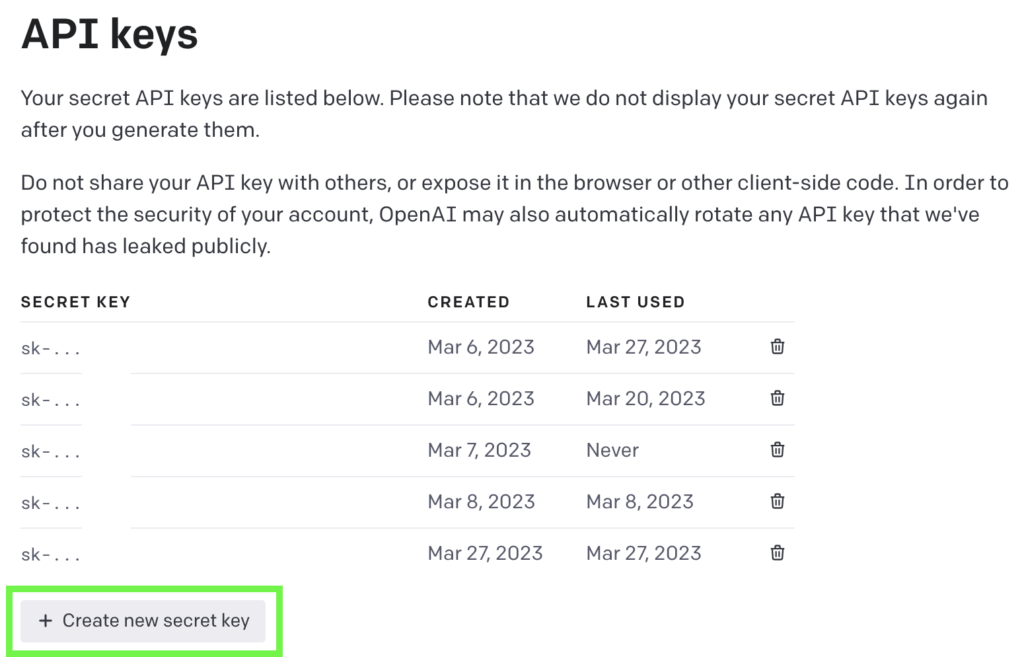
Then copy your API key.
Then go back to that window (as seen below) and paste your API key.
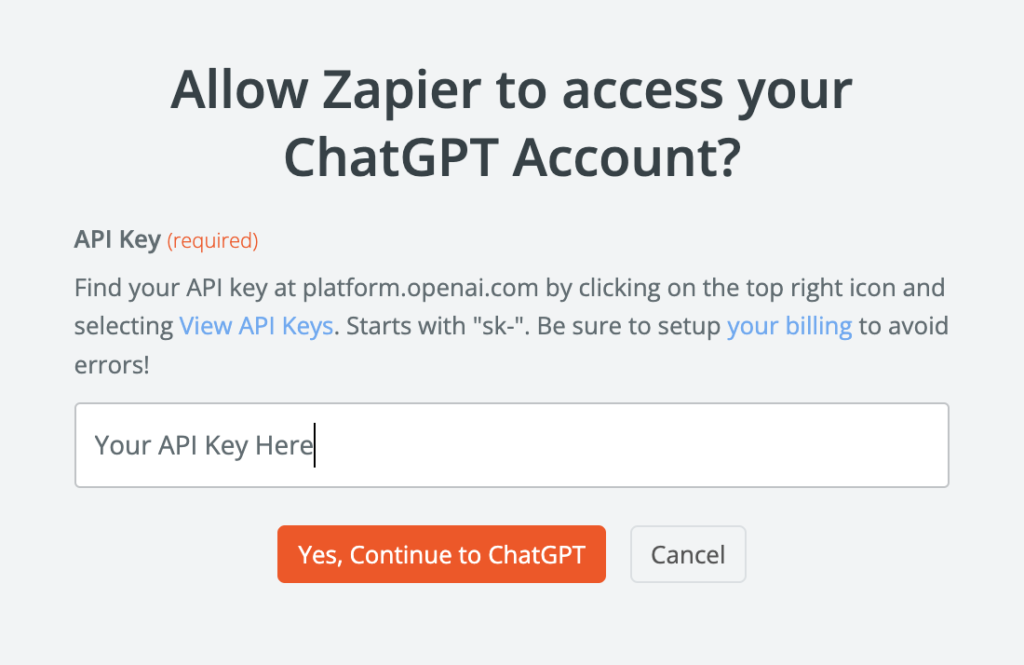
Then click “Yes, Continue to ChatGPT.”
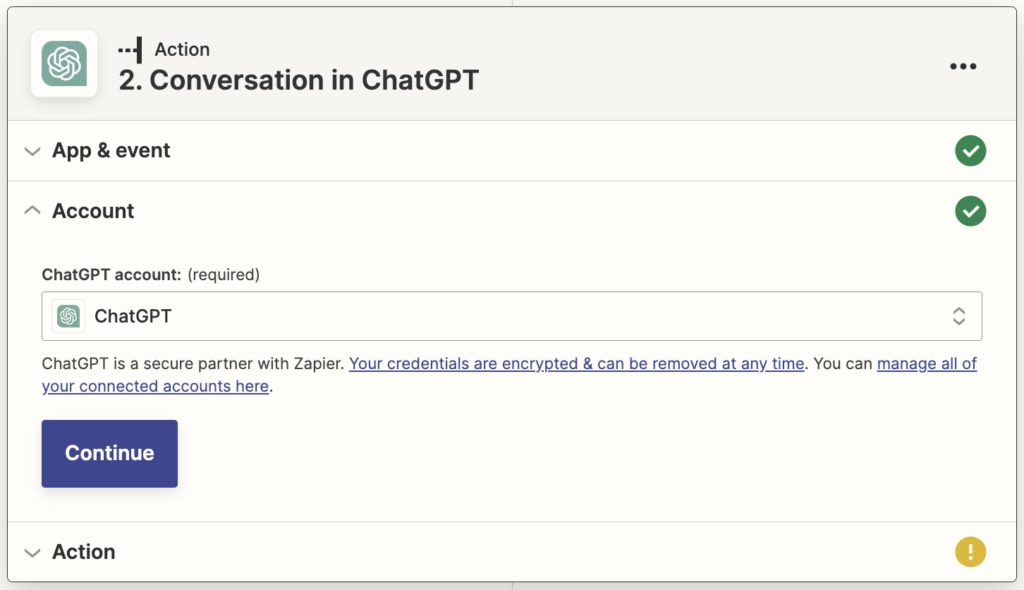
Now that you’re connected, click Continue to go onto the Action section.
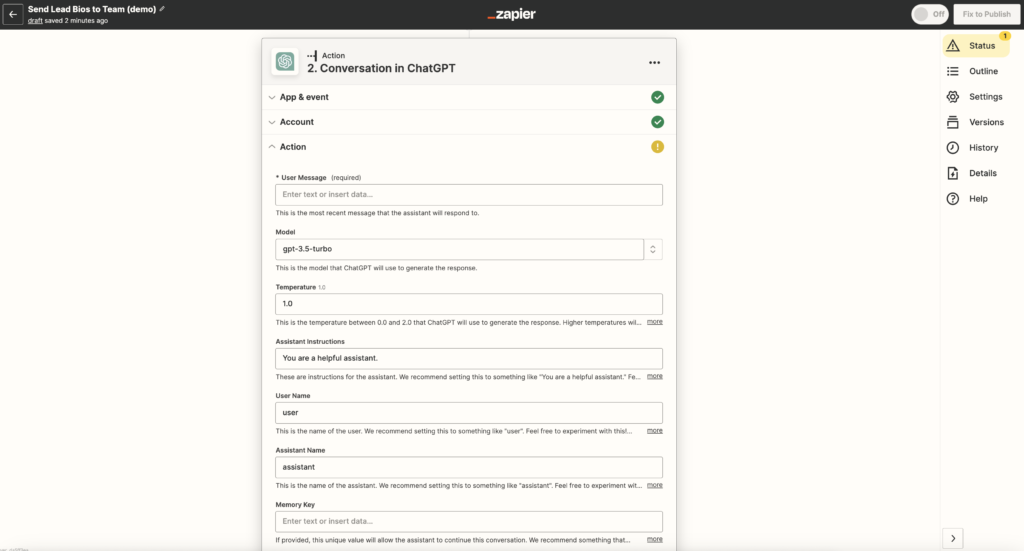
4. Set your Chat GPT configurations in the Action section of your ChatGPT action.
I’ll make adjustments to 4 settings for my this: the User Message, the Model, the Temperature and the Assistant Name.
The User Message is where we will type the message template we’ll be sending to Chat GPT, which will include CRM data and other specifications.
Here’s what I’m using for this demo:
User Message:
Below is a new prospect for our company’s CRM consulting services. Write a short, accurate bio about the prospect that I can share with our team. Don’t make anything up about the prospect that is not clearly found in the below data. Include a call to action for team. Use the following info about the prospect:
Name: {insert name field}
Job Title: {insert job title field}
Phone number: {insert phone number field}
Email address: {insert email address field}
Organization name: {insert organization name field}
Organization Website: {insert website field}
Organization Country: {insert organization country}
sales rep that brought in the lead: {insert contact owner field}
Now, wherever we put the brackets, we’re going to replace them with actual data fields from Pipedrive CRM. To do that, click into white space in the User Message box, click Show all options, and select each field.
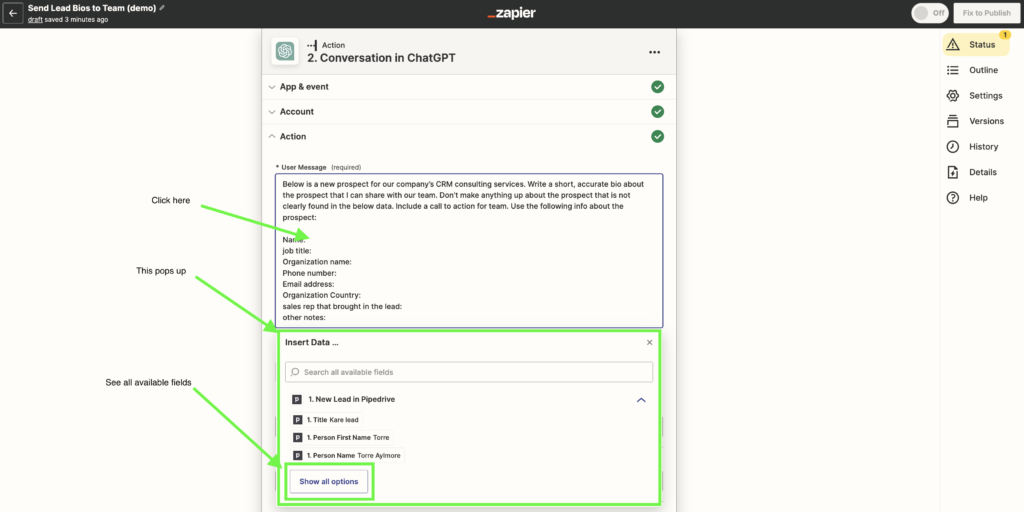
Once you’ve input your Pipedrive data fields, it will look something like this:
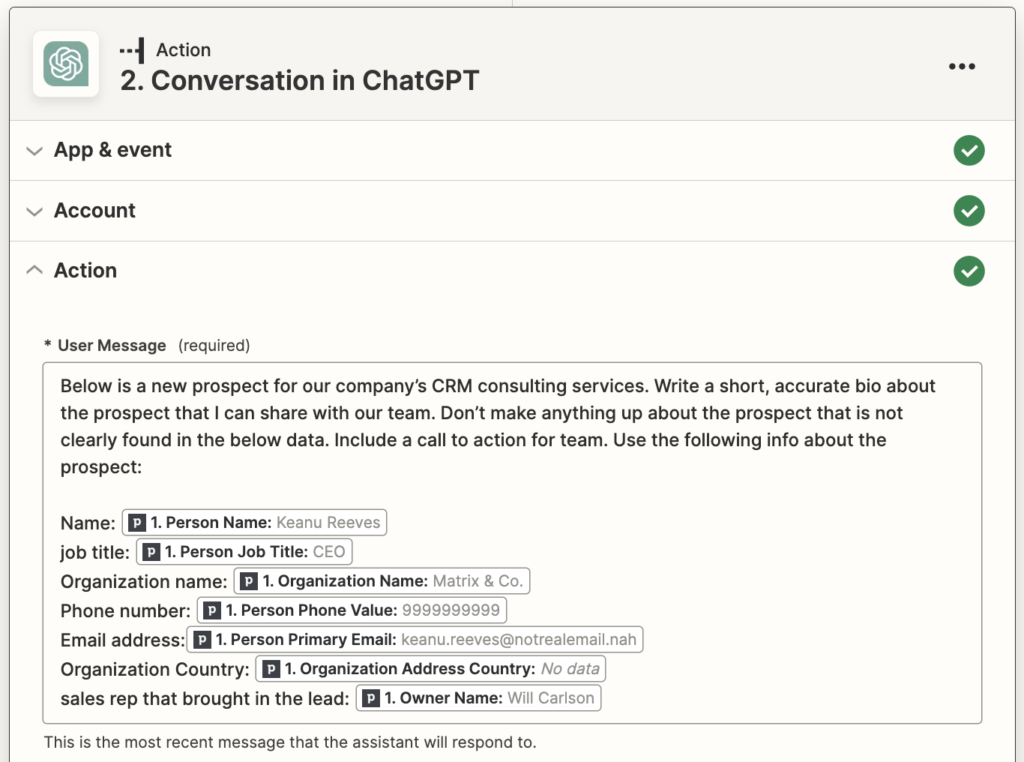
As you can see in the above image, the data field is displayed with the P (for Pipedrive), and the test data in grey.
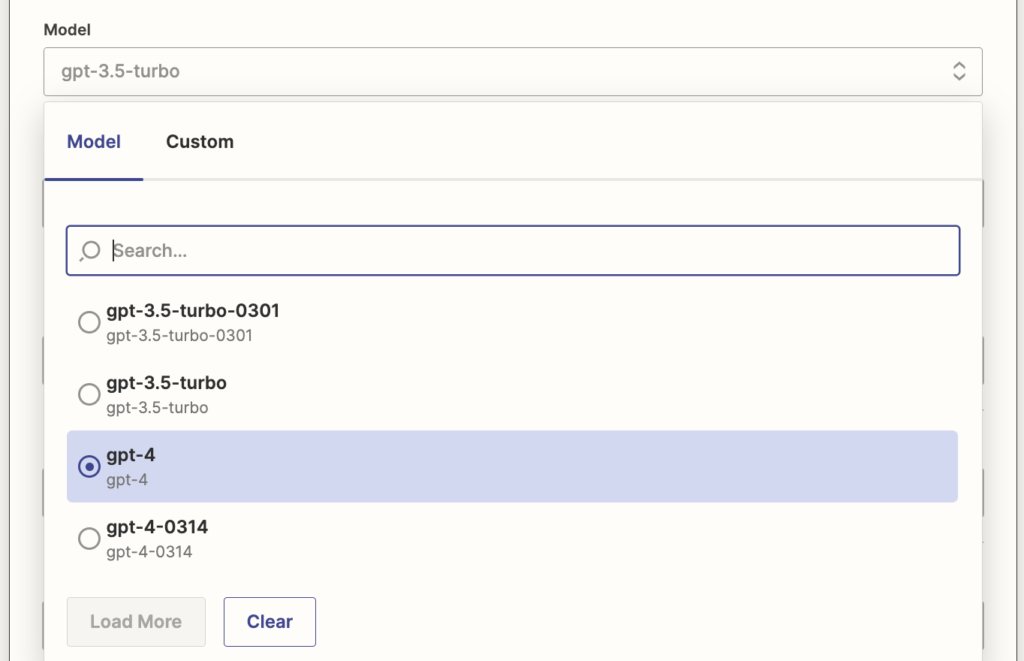
Next, change the model to GPT-4.
Then adjust the Temperature.
The temperature parameter affects the randomness or creativity of the AI-generated responses. The higher the temperature, the more creative the response, and it is recommended to use a temperature within the 0 to 2.0 range. I’m using a relatively low temperature because in this case i’m not looking for creativity, but rather just a simple bio using the basic data points provided in Pipedrive. This is something that you’ll want to play around with as you go, making adjustments as needed over time until you get it right.
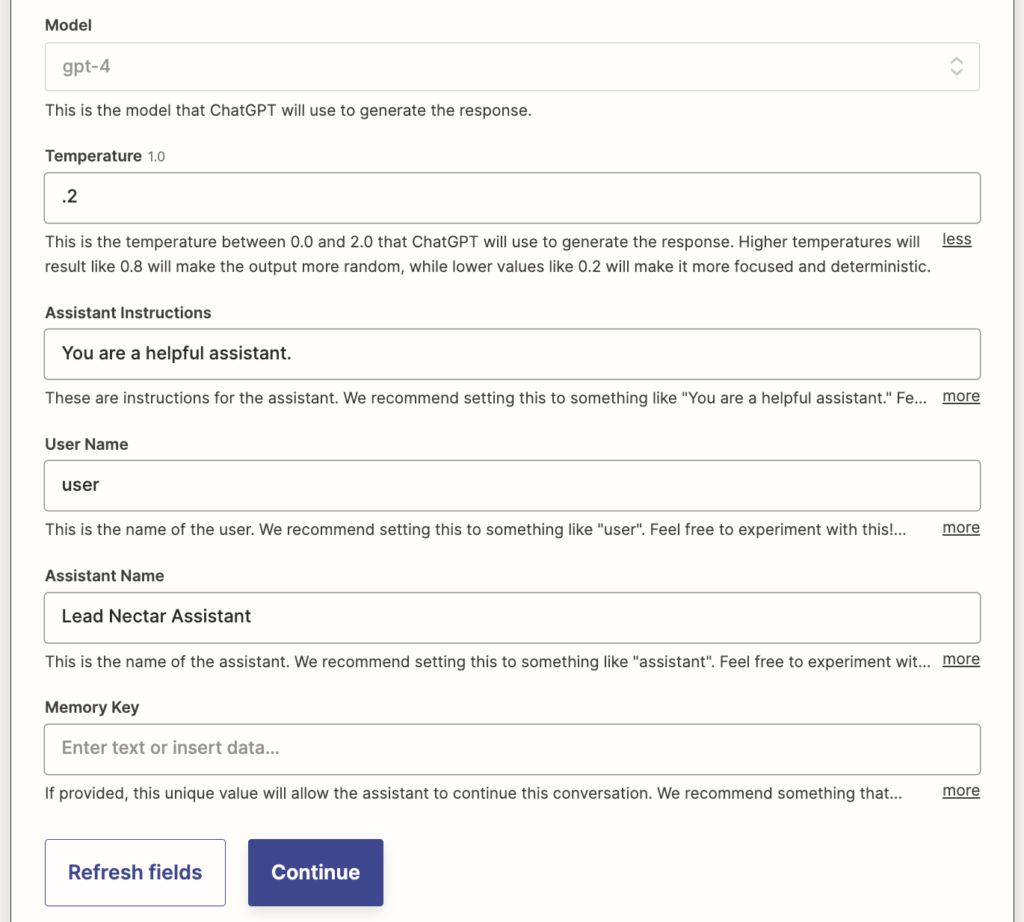
I also changed the assistant name to Lead Nectar Assistant.
You can leave the other settings as is, and click “more” to the right of any setting to read an explanation about it.
Click Continue to run our test!
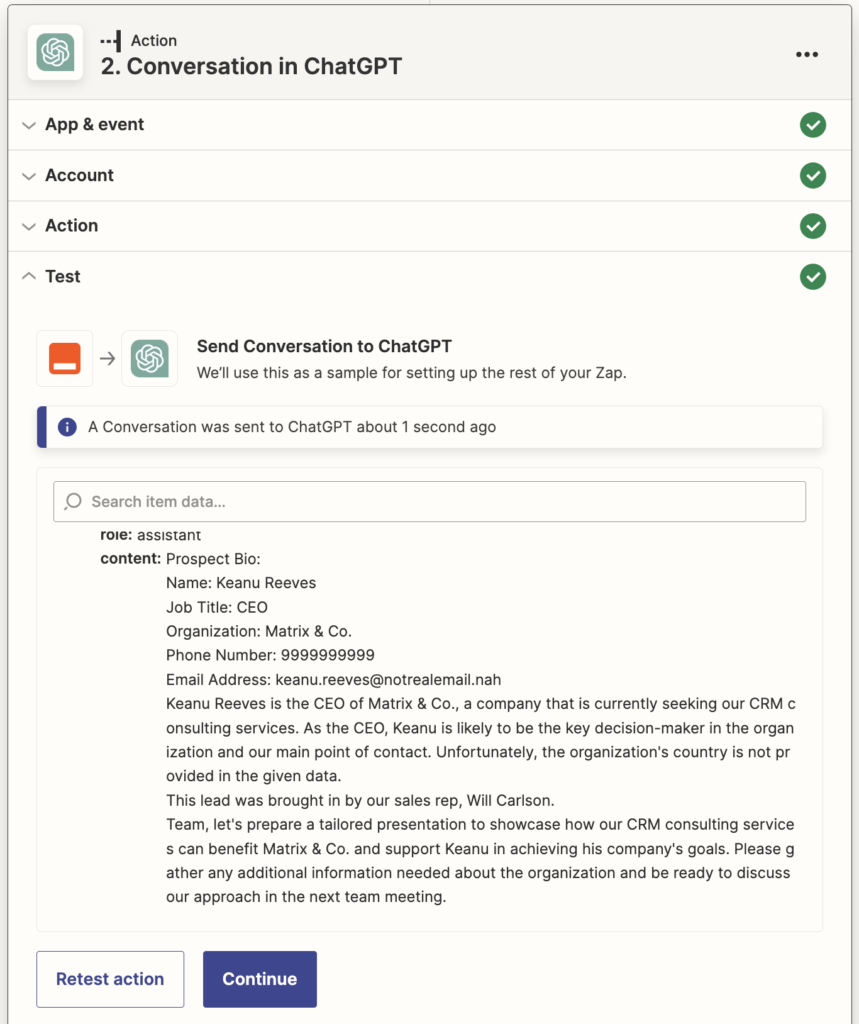
There it is. It’s a bit long, so I’ll adjust my Chat GPT prompt to make sure it’s no longer than say 500 characters.
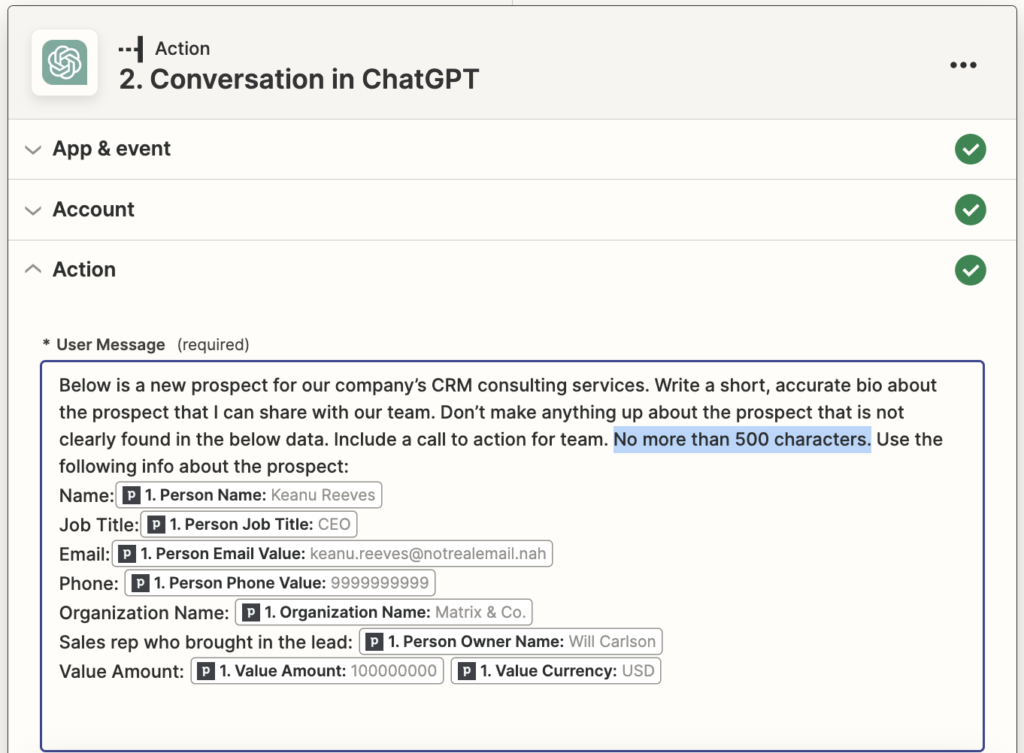
Have a look at how that changed it:
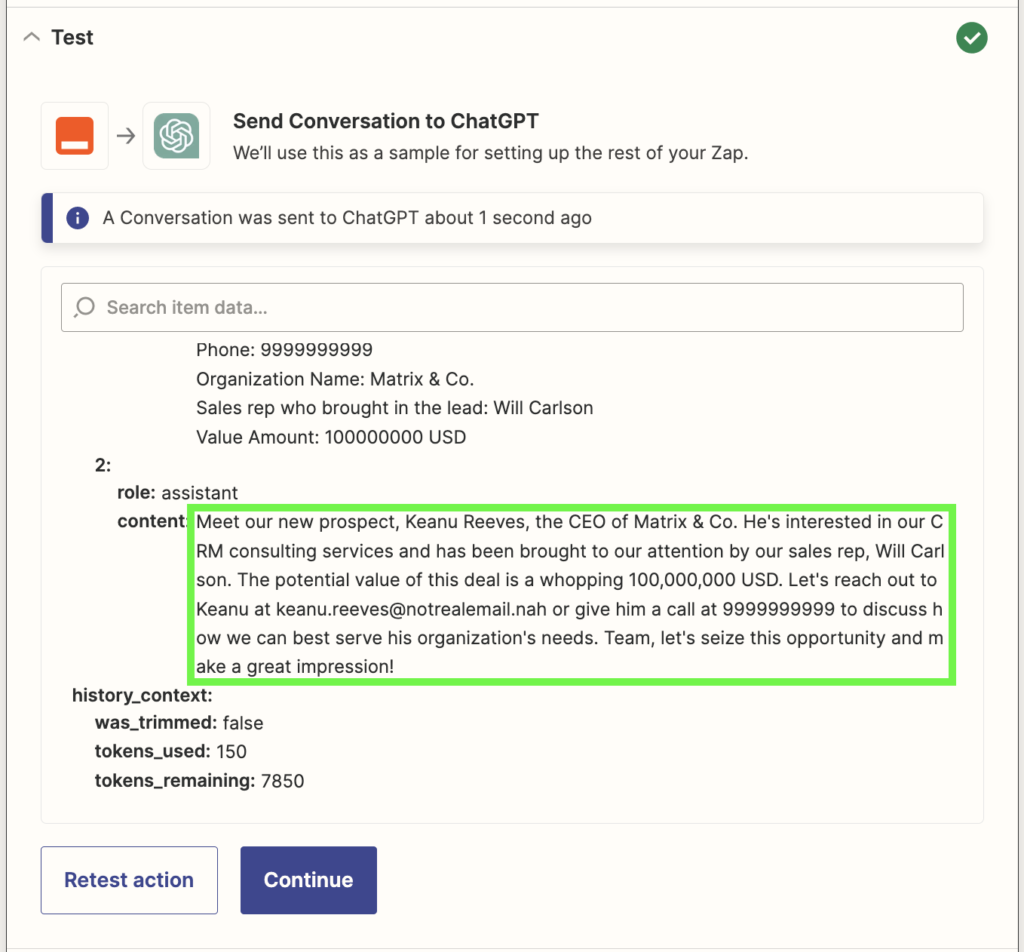
Cool. Keep testing and fine-tuning your User Message as you go to optimize results.
Time for the final step!
Step 3: Set Up Slack Message
Start typing Slack and choose it from autocomplete.
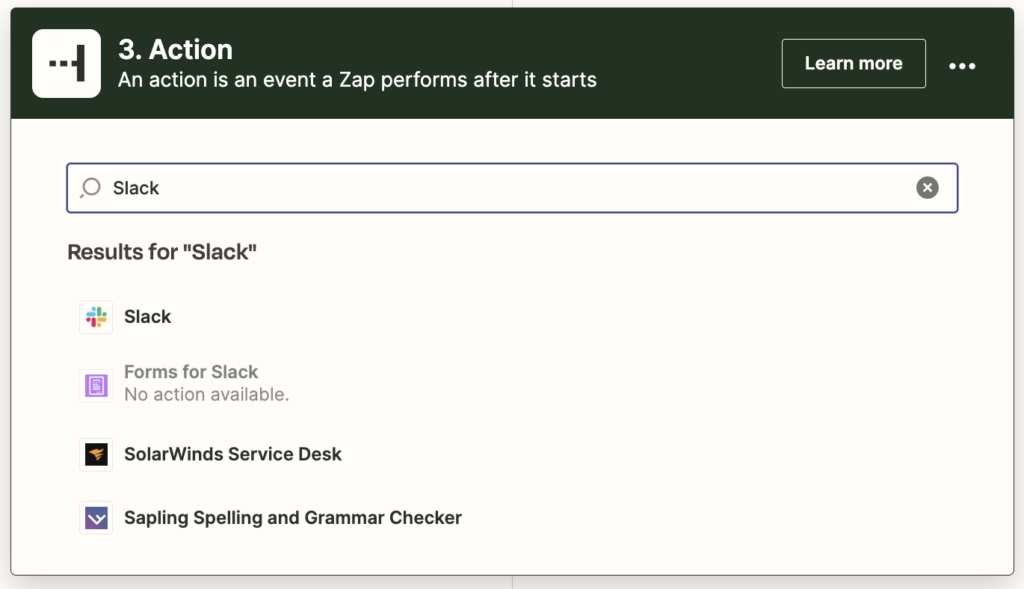
Choose “Send Channel Message” in the Event dropdown.
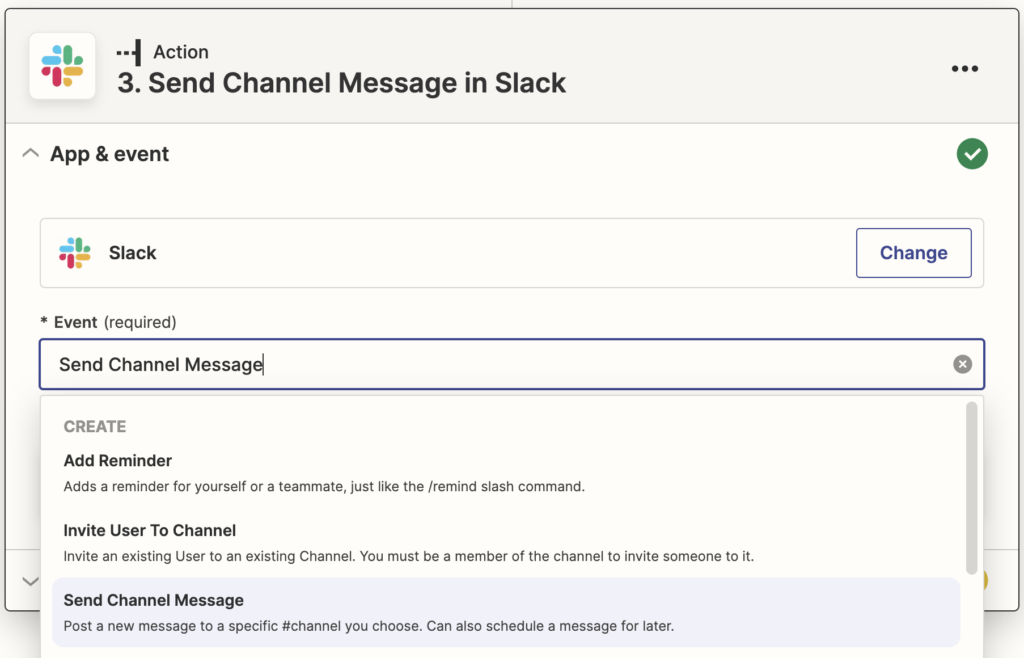
Then click “Continue.”
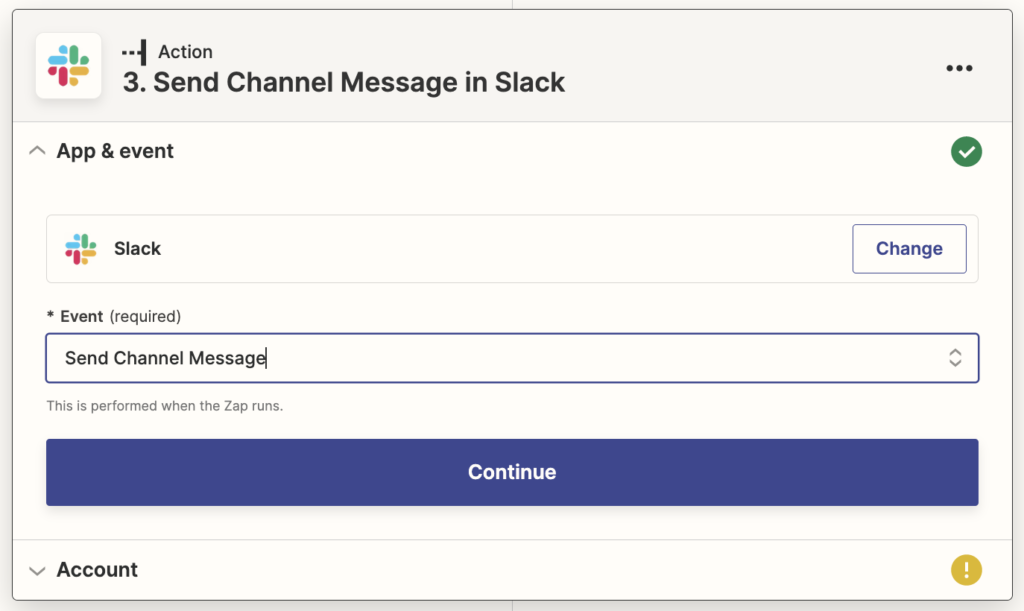
If it’s your first time using Slack in Zapier, click Sign in.
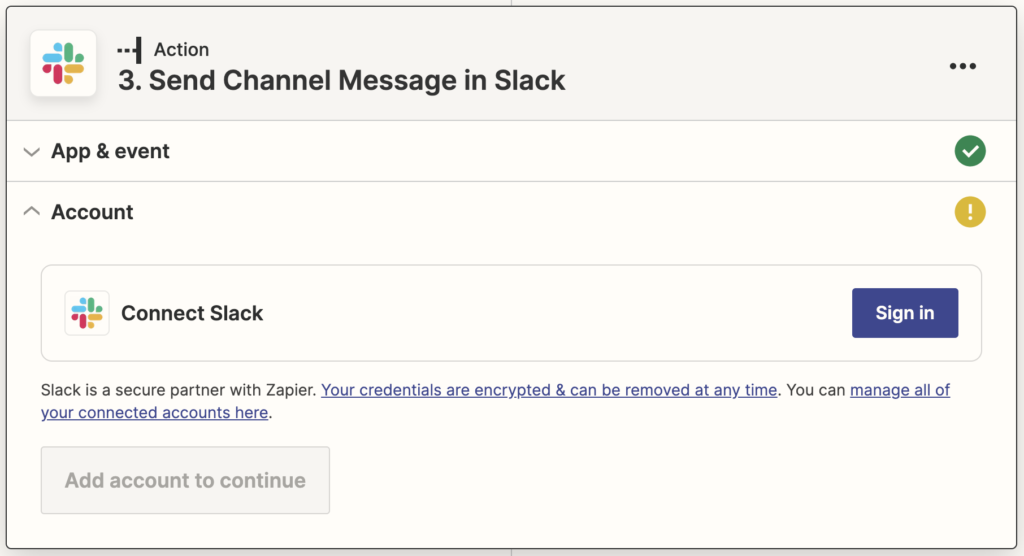
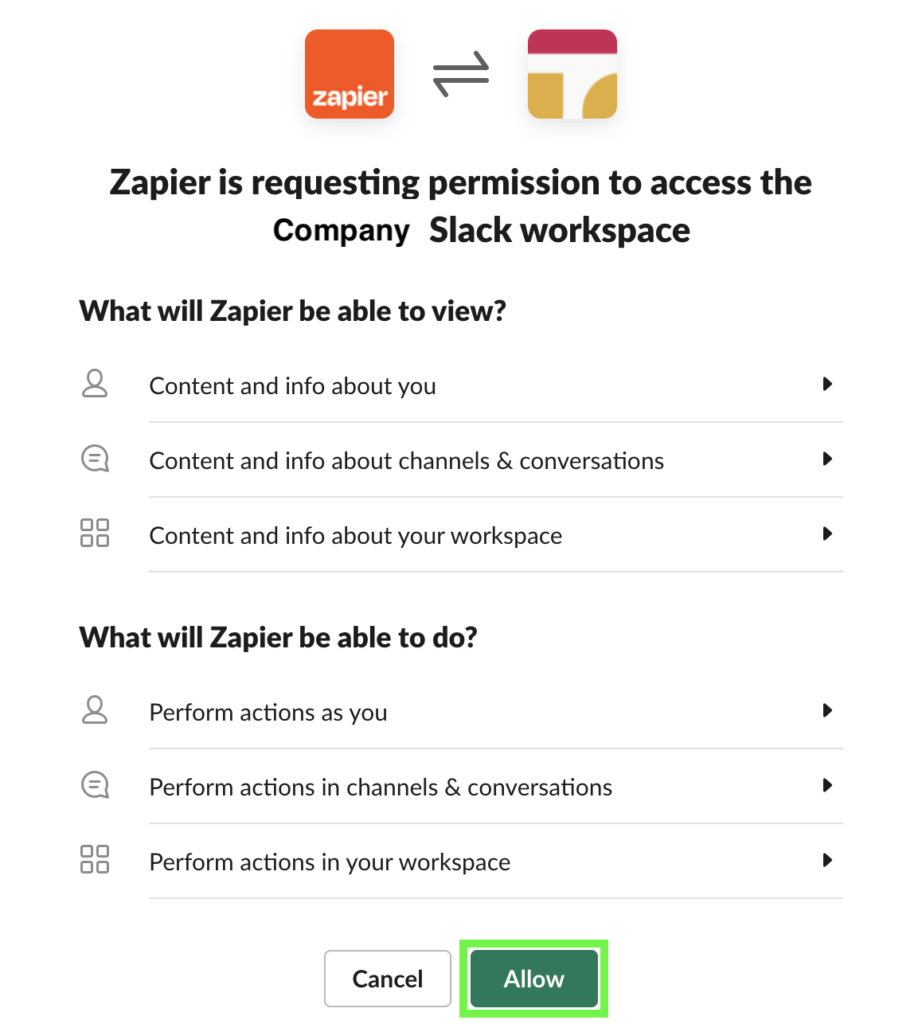
That opens up the sign-in pop up window, where you’ll input your Slack workspace.

Sign into your workspace and grant Zapier access to your Slack account.
Now you should see your Slack account connected to Zapier.
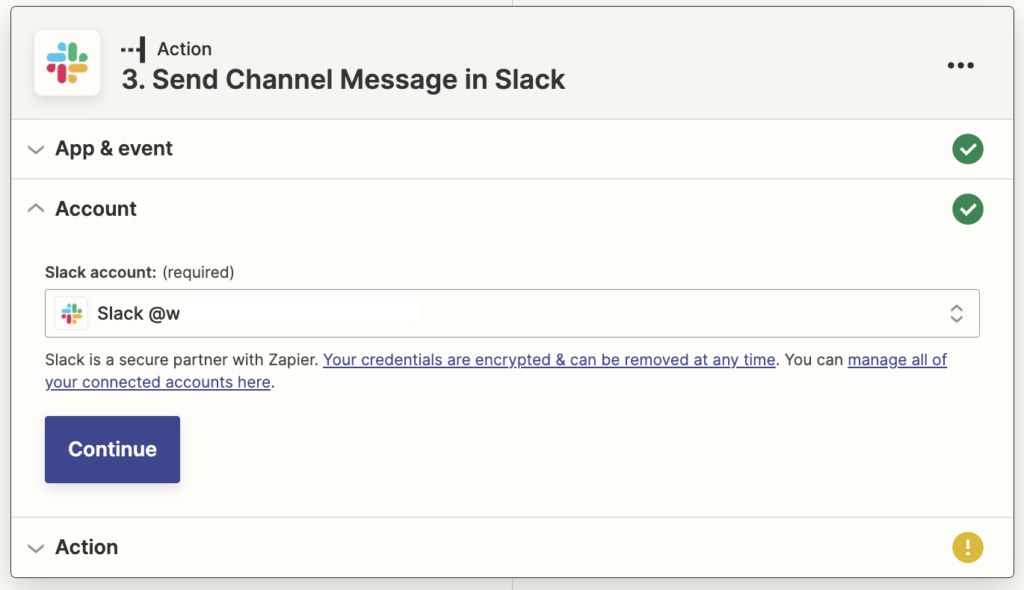
Once connected, click “Continue.”
That opens up the Action portion of this step.
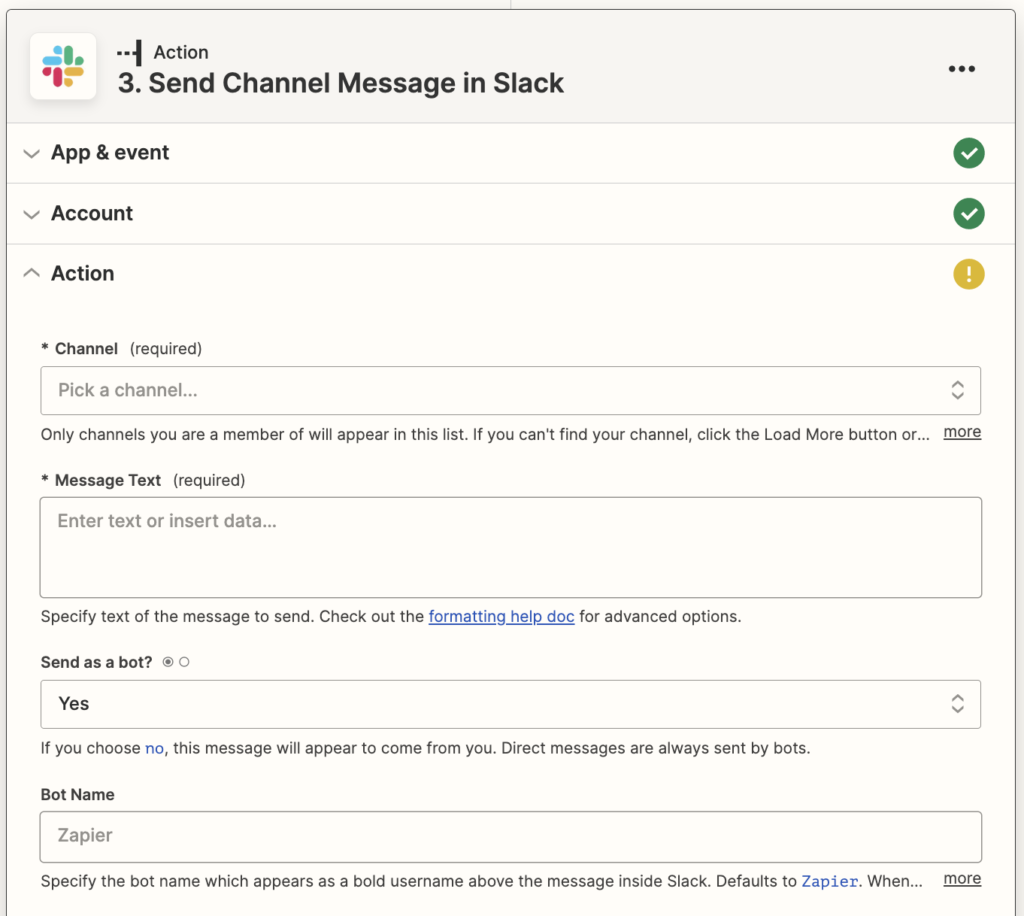
Click into the Channel dropdown and choose the Slack channel where you’d like these messages to be sent to.
Then click into Message Text and input your message. I’ll start it out with “New Lead Alert!” This will be in all of the messages, regardless of what ChatGPT says.

Now let’s get the ChatGPT data to come through the message text. Click into the whitespace of the Message Text box to access the variables.
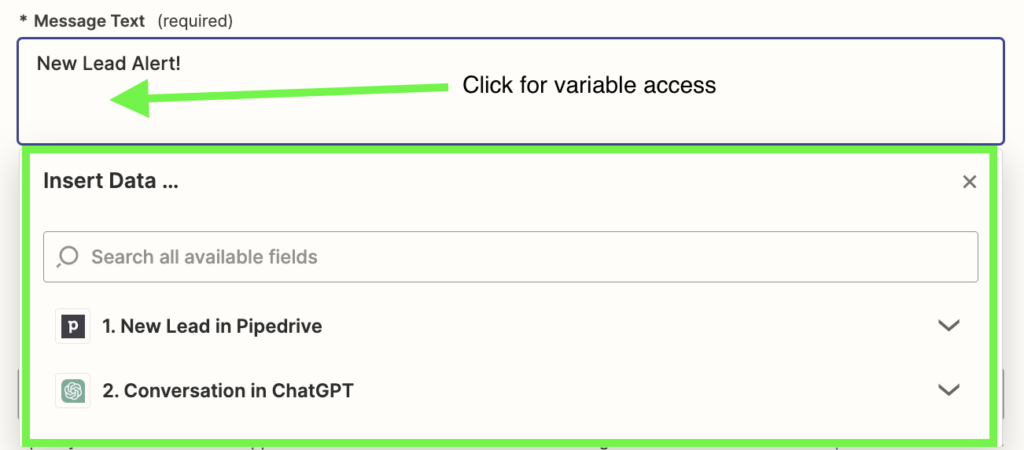
To browse all available data fields, in the “Insert Data…” area, click the down arrow next to “2. Conversation in ChatGPT.”
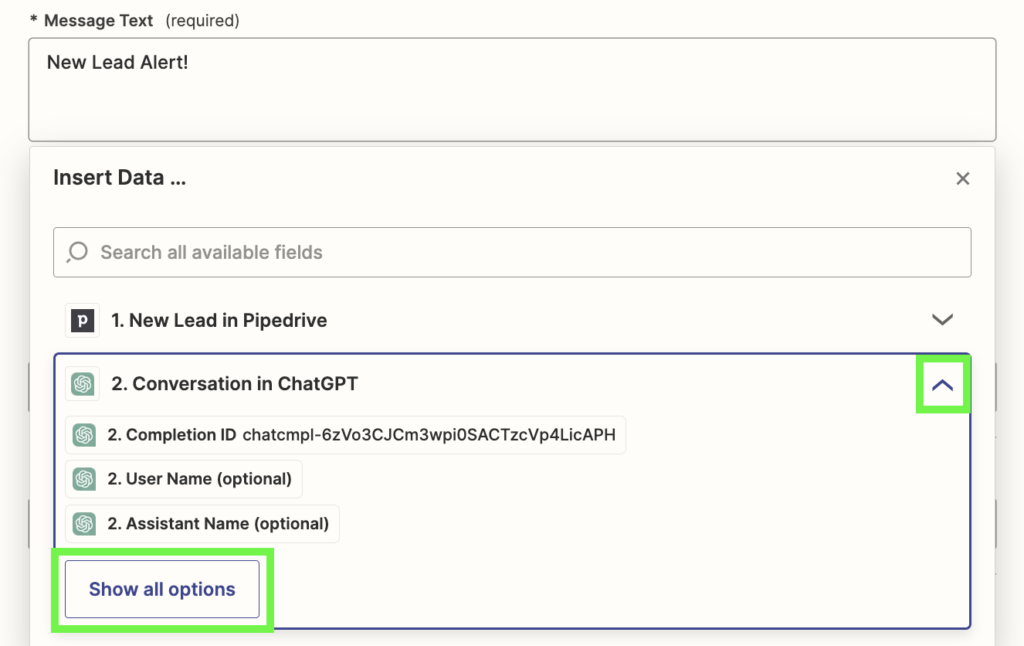
Alternatively, in the search box, you can type “response” and from autocomplete, choose “Assistant Response Message:”
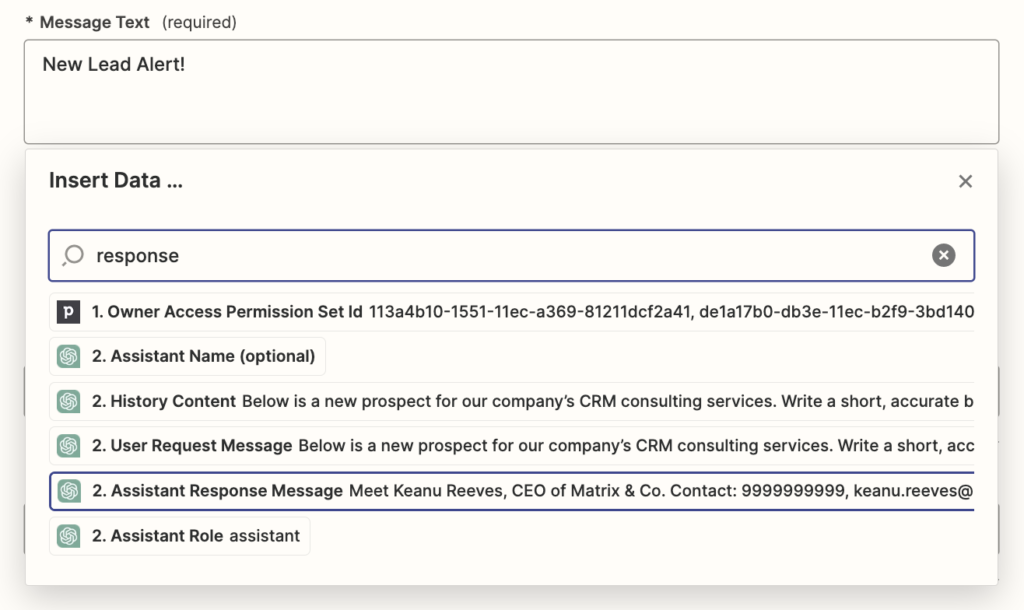
Once selected, you’ll see the variable loaded into the Message Text box, and it will include some data from the previous step’s test.
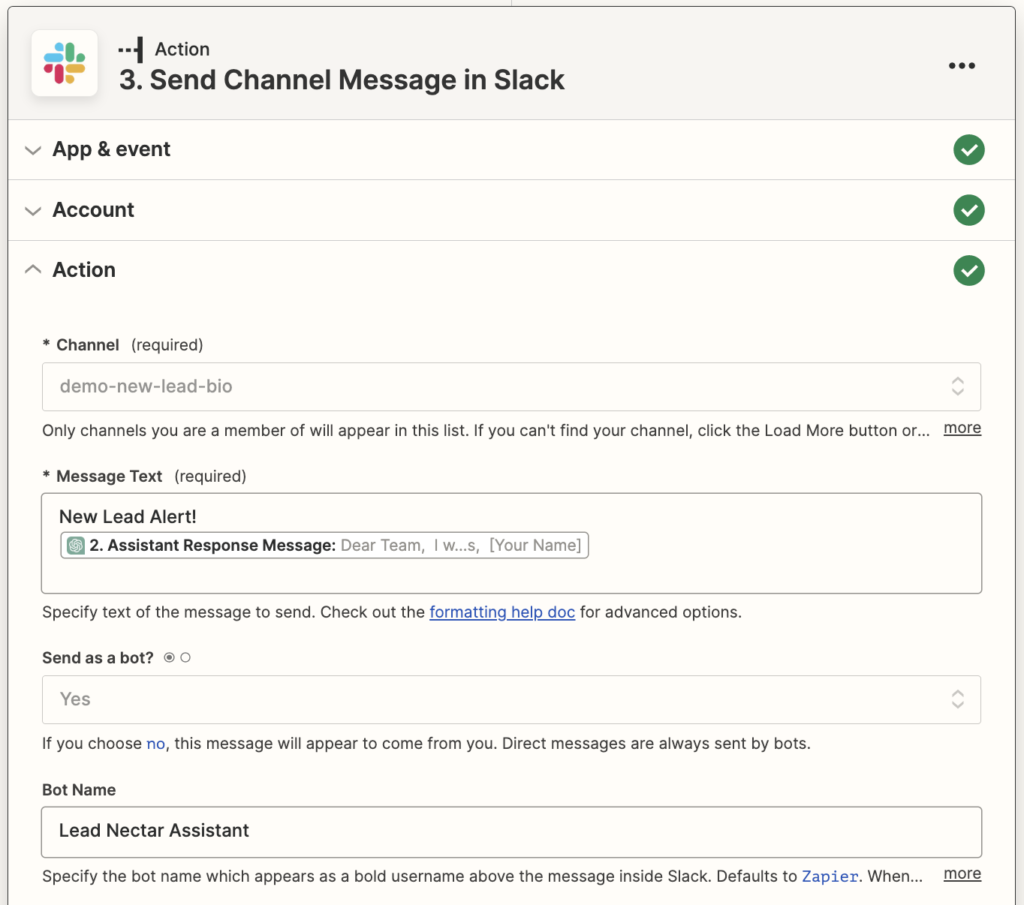
Click Continue. Now run your final test. You should see the text message appear here, as well as inside of Slack!
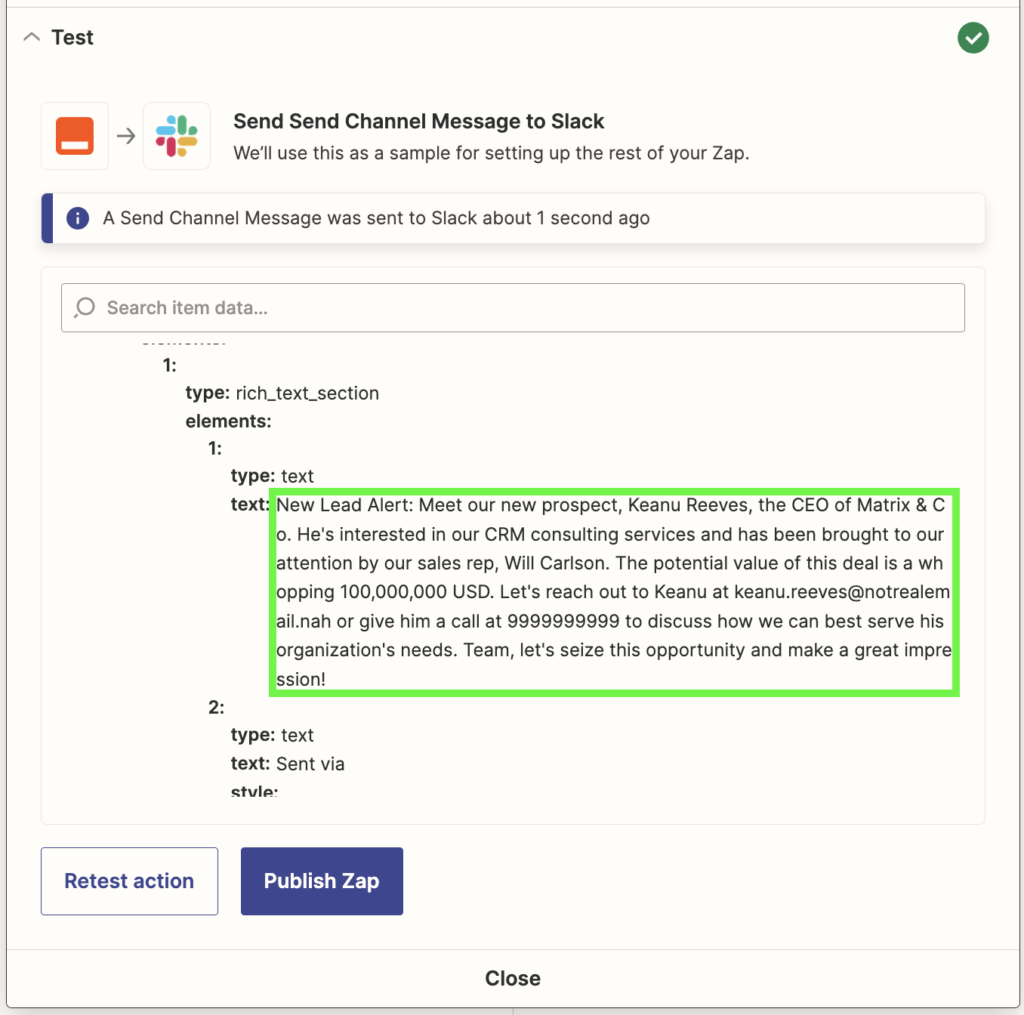
Open up Slack and verify that the message came in:

Boom! Now your entire team can get updates on new leads as they enter your CRM. Pretty cool.
Conclusion
This step-by-step tutorial has provided you with the necessary knowledge to seamlessly integrate Pipedrive, ChatGPT, and Slack using Zapier. By following these instructions, you have successfully automated the process of generating insightful bios for new leads in Pipedrive through ChatGPT and sharing them with your team on Slack. Even better, you have learned how to do it. With this newfound efficiency and enriched understanding, you will be able to make amazing things happen for your business!
