Introduction
In the high-stakes game of business development, project management (PM) and customer relationship management (CRM) are crucial to your success.
Professionals are often juggling multiple projects, thousands of relationships, and a to-do list that just keeps growing. It can be tough to keep track of everything and everybody.
PM and CRM software can be immensely helpful with these challenges.
But sometimes it can feel like an uphill battle to use two separate, independent software systems (one for your PM and one for your CRM). It takes time to learn new tools, and often it’s difficult to integrate them, even if they have integration plugins available.
You end up doing extreme amounts of work to create “work-arounds” when you could be spending that time delivering on projects and closing deals.
Pipedrive’s new Projects feature allows users to leverage the power of PM and CRM software in the same easy-to-use UI Pipedrive CRM is known for.
If you’re looking for an easy to use Project Management tool that completely and seamlessly integrates with an already easy to use CRM, continue reading.
Note: If you don’t have a Pipedrive account but want to follow along on your side, get a 30 day free trial account here and join us right back here.
Let’s briefly go through an example project using the Projects feature in Pipedrive:
Creating a Project
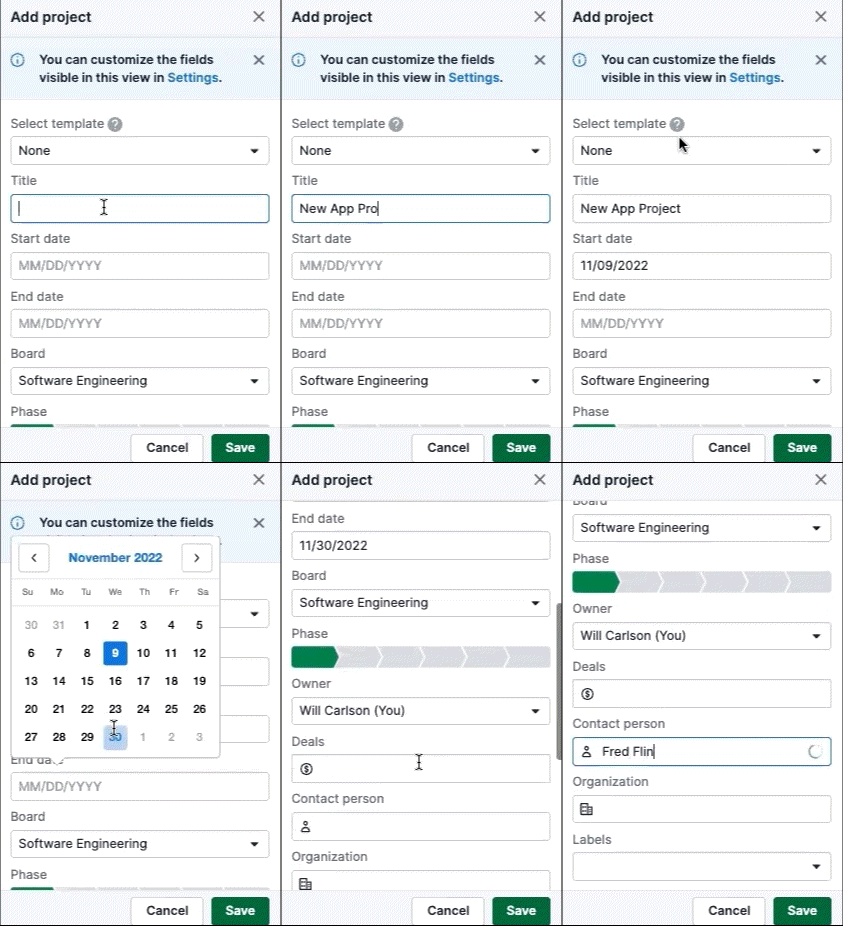
From the Projects page, click on the “+ Project” button and enter your project’s name, description, start date, and end date. Here you can optionally link the project to any contact, organization or deal. Once you’ve entered this initial information, click Save to create the project. Note that you can also create a project from inside a contact, organization, or deal profile by clicking the “+ Project” button.

Developing a Project Plan
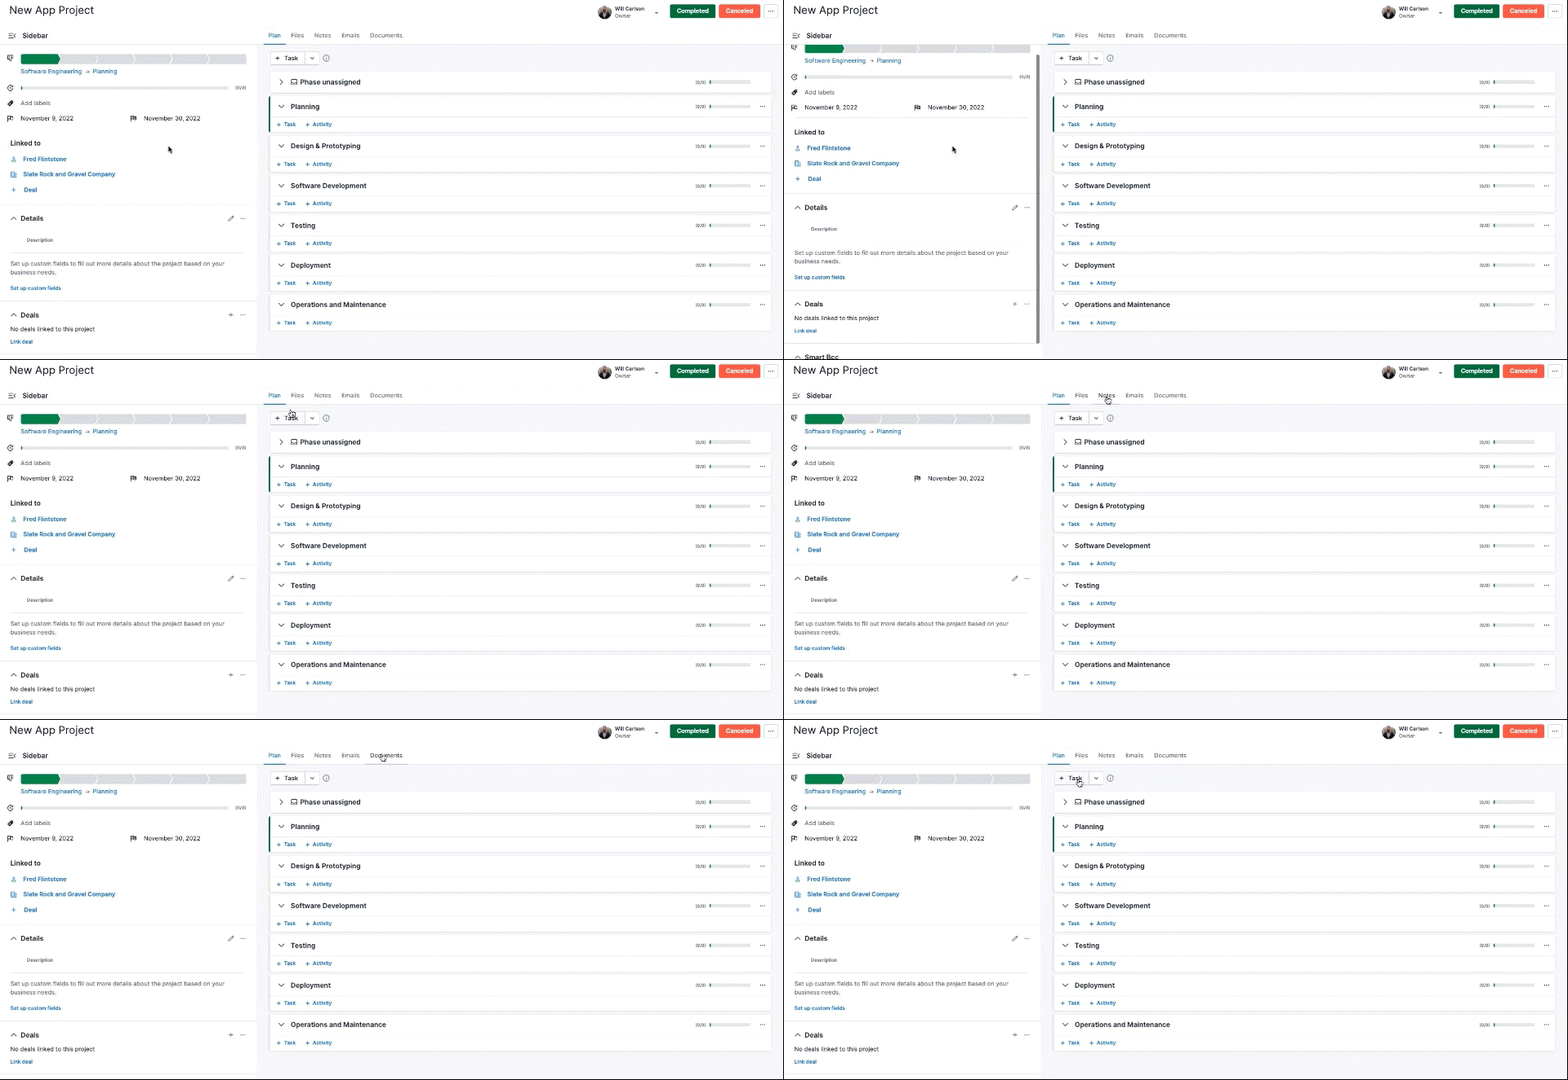
Once you’ve created your project, you’ll see it displayed inside your project Board, along with any other projects that you or your team may have created.

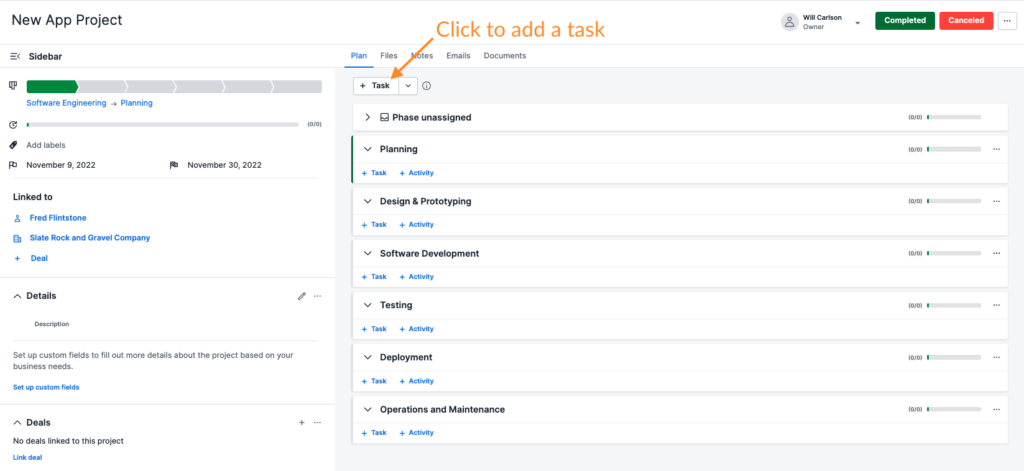
Click into the project to see the Project page which contains important details. The sidebar at left displays info such as the project stage (it’s currently in the first stage – Planning), the progress bar (it’s currently empty because we haven’t completed any tasks yet), and other details that we set at project creation, which you can edit on this page (start and end date, contact/organizations/deals linked to, etc.).
You can add a task by clicking “+ Task.”
This opens up a side drawer for your task’s details. Here you can assign it to a specific team member, set a due date, and add any notes or attachments that may be necessary. You can also add sub-tasks, for which you can assign a due date and assignee also. I made a task for calculating the costs of the project (left) and made 3 subtasks (right).
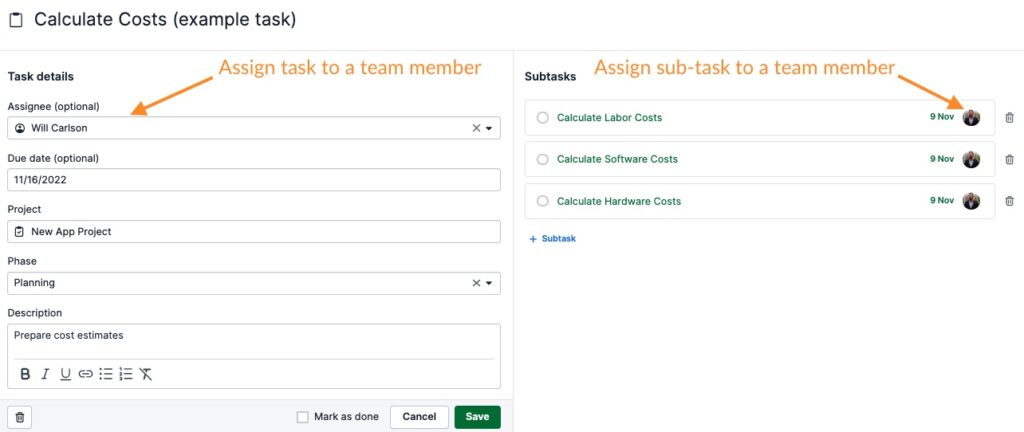
Click to save your new task and return to your Project page to add and assign more tasks. I’ll add more tasks now which will be displayed in the Tracking Progress section below.
Tracking Progress
Back on the Project page, you can view of all of the tasks that need to be completed and when they are due, inside each stage of your project lifecycle. You can drag any task to reassign it a different stage, and you can click into any task to see more details on how it’s progressing. Once you finish a task or subtask, click the radio button to mark it as complete.
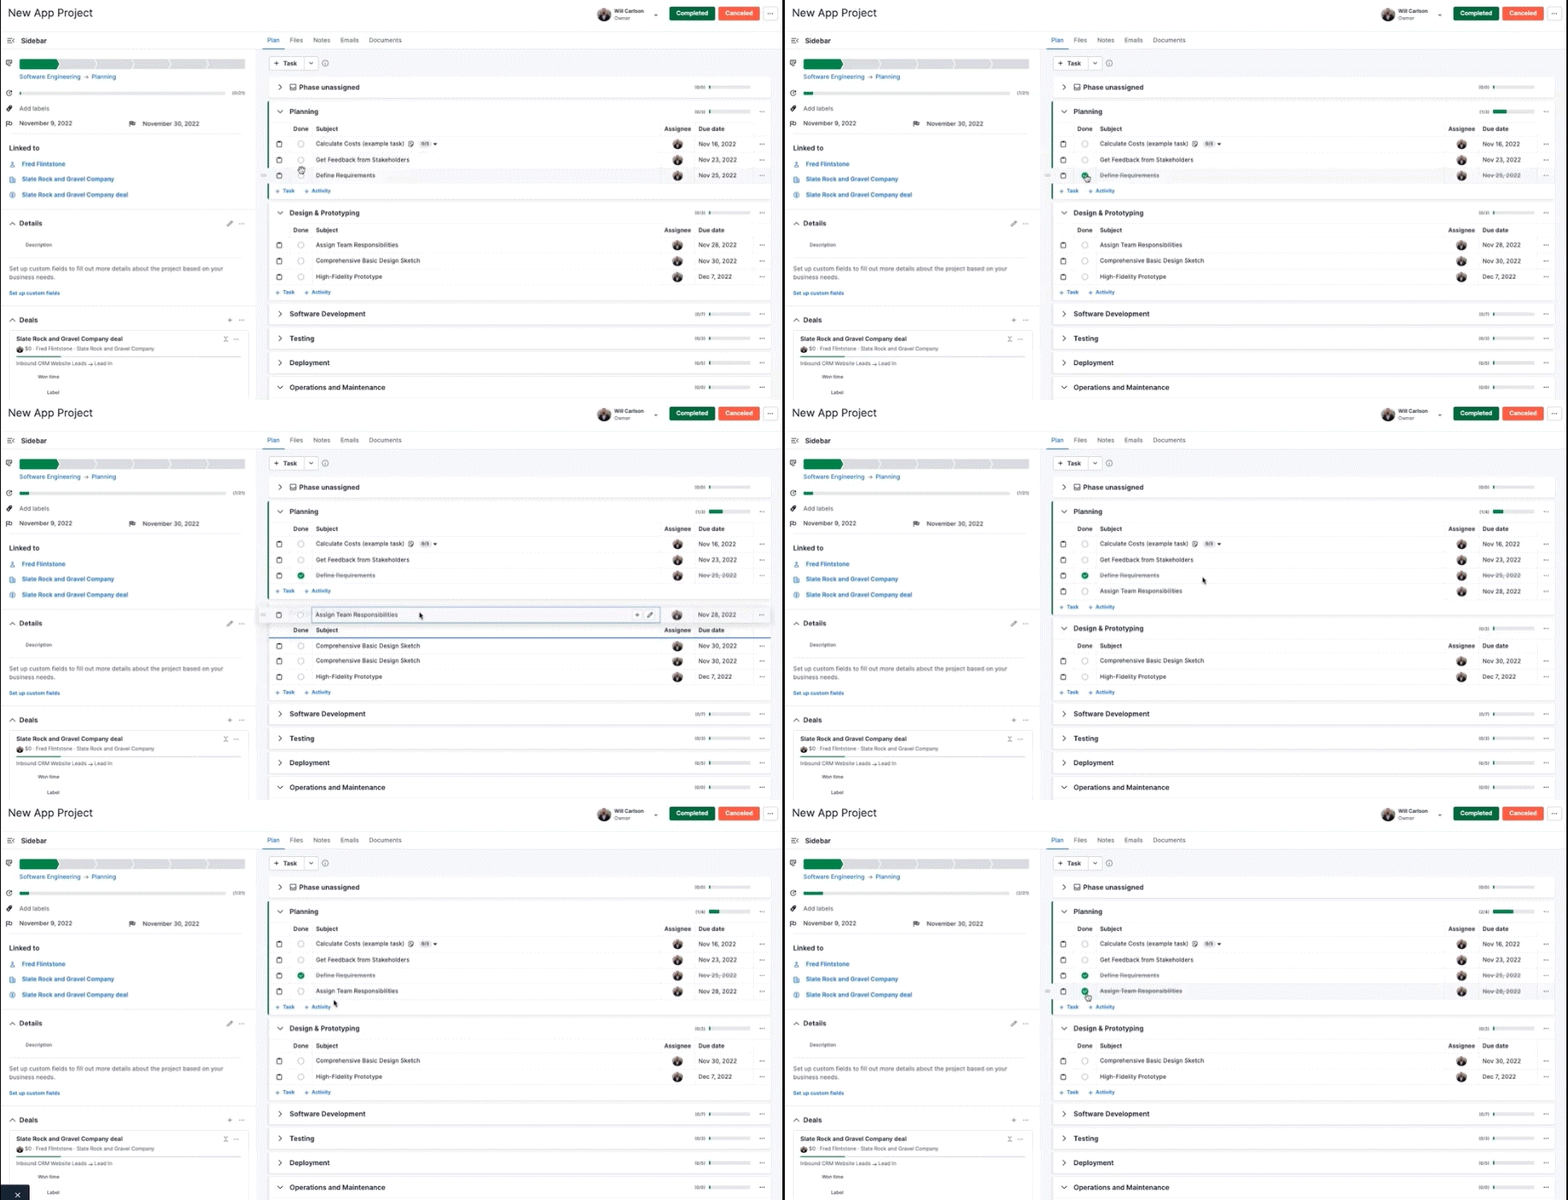
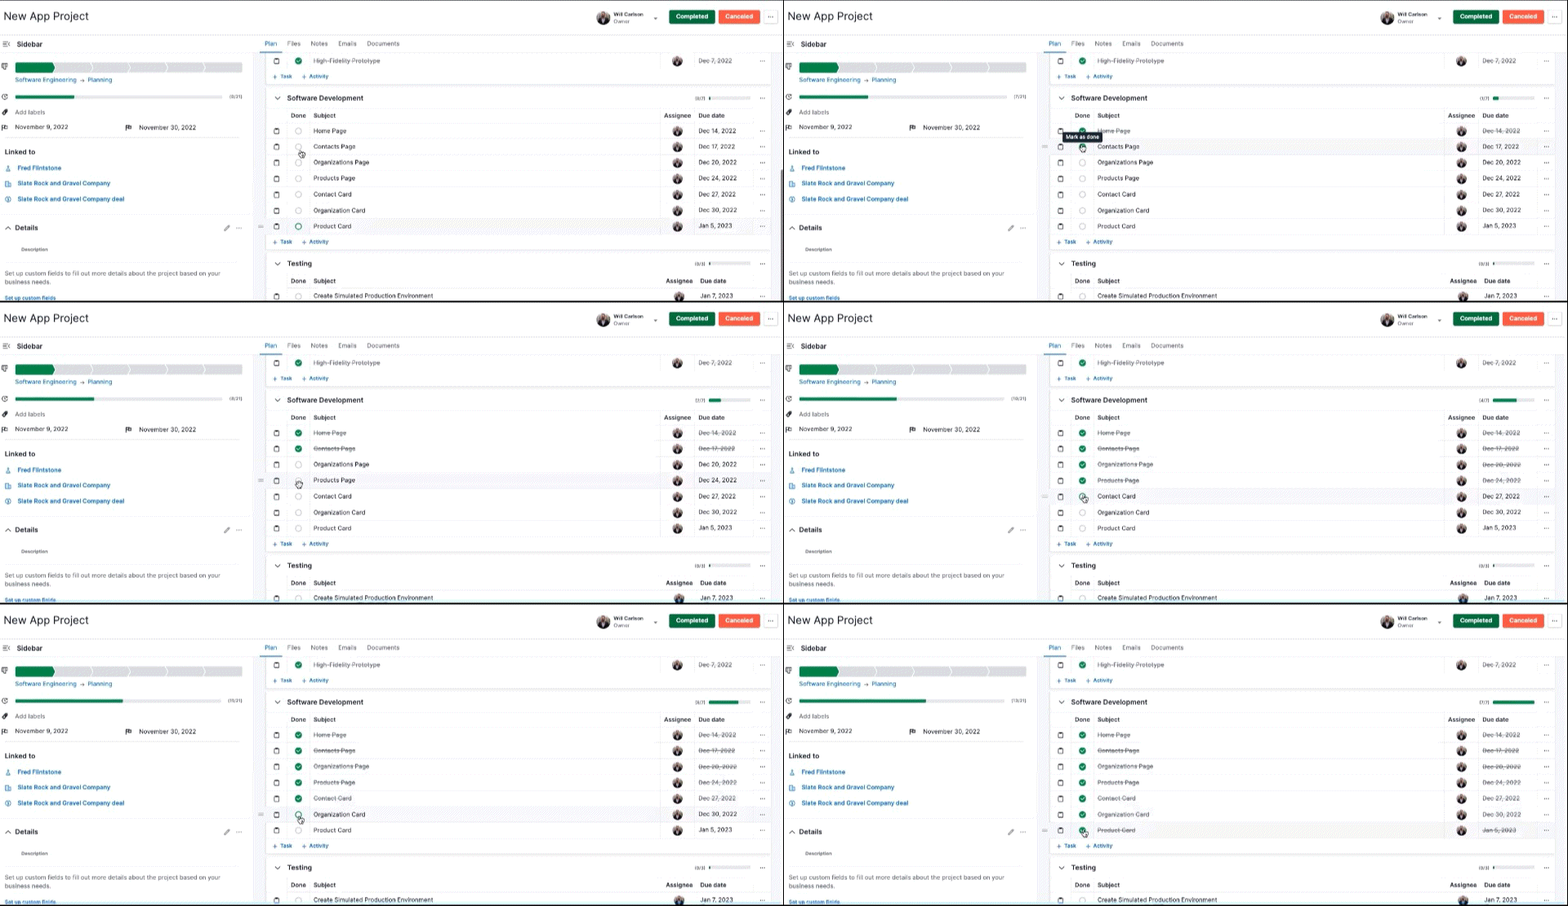
As you mark each task complete, you’ll see the project’s progress bar (green bar on left in pic below), and the task stage’s progress bar (green bar at right in pic below) fill up with green.
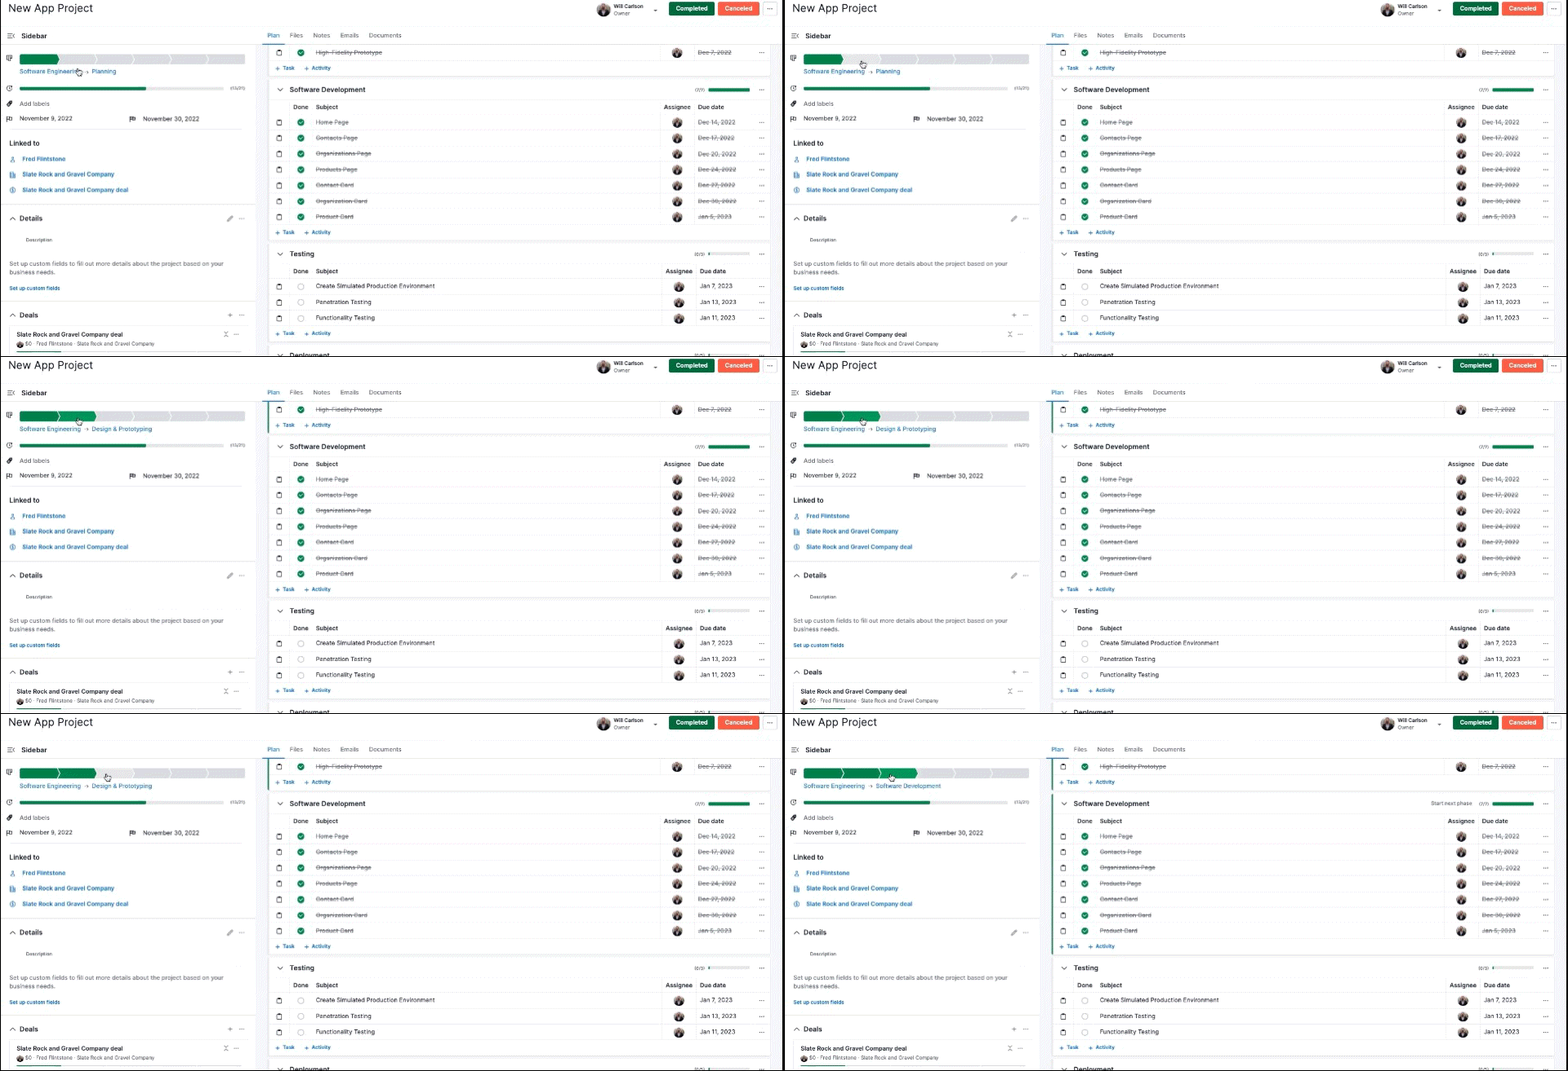
You can move your project from stage to stage inside of the Project page by clicking on the stage in the sidebar at left:
You can also change the project stage from the Project board, where you have a bird’s eye view of all of your projects in the same board.

From your board, click and drag any project to move it from stage to stage.

When you’ve completed the project, drag it into the Complete bucket.

Handling Multiple Project Boards
Often, project managers will be handling multiple types of projects, for which a standard “one-size-fits-all” board will not apply. For this purpose you can add a new board. Click the chevron next to the Edit pencil icon on the Projects page and click “New Board.” Design the stages of development as you see fit, and click Save Changes.

Now, you can toggle between different project boards in the Projects page.

Automation Magic
It really is amazing to have CRM data so connected to your project management.
All of that info about your contacts, organizations and deals is now synced to all of that info about your project.
But wait… Theres more!
How about some automation?
Picture this. You’ve just made a web development sale – you sold a new website. The sales process was tracked in your CRM.
Wouldn’t it be great if your PM software could automatically create a project?
Well. You guessed it, Pipedrive has you covered. Use their Workflow Automation functionality to automatically generate a new project upon closing of a deal.
Conclusion
Pipedrive’s new Projects feature makes it easy to create and track projects while seamlessly integrating into the easy-to-use Pipedrive CRM. With this powerful new tool, you’ll always know what needs to be done and when it needs to be done so that you can keep your projects on schedule and under budget, wow your clients, and earn more business.
Want to give Pipedrive’s Project feature a test-drive? Sign up for a 30 day trial of Pipedrive below, and let me know if you have any questions down in the comments section!
As a Pipedrive Affiliate Partner, Lead Nectar will be compensated if you decide to purchase a subscription after completing your free trial from the above link 👍
Will Carlson
Lead Nectar provides transformational business consulting to companies in Investment Banking, Investment Management, SPACs (Special Purpose Acquisition Companies), DeFi, FinTech, RegTech, Logistics, Food Services and Non-Profit Organizations.
